Render Controls - Camera
The Camera tab contains controls for the virtual camera in the scene.
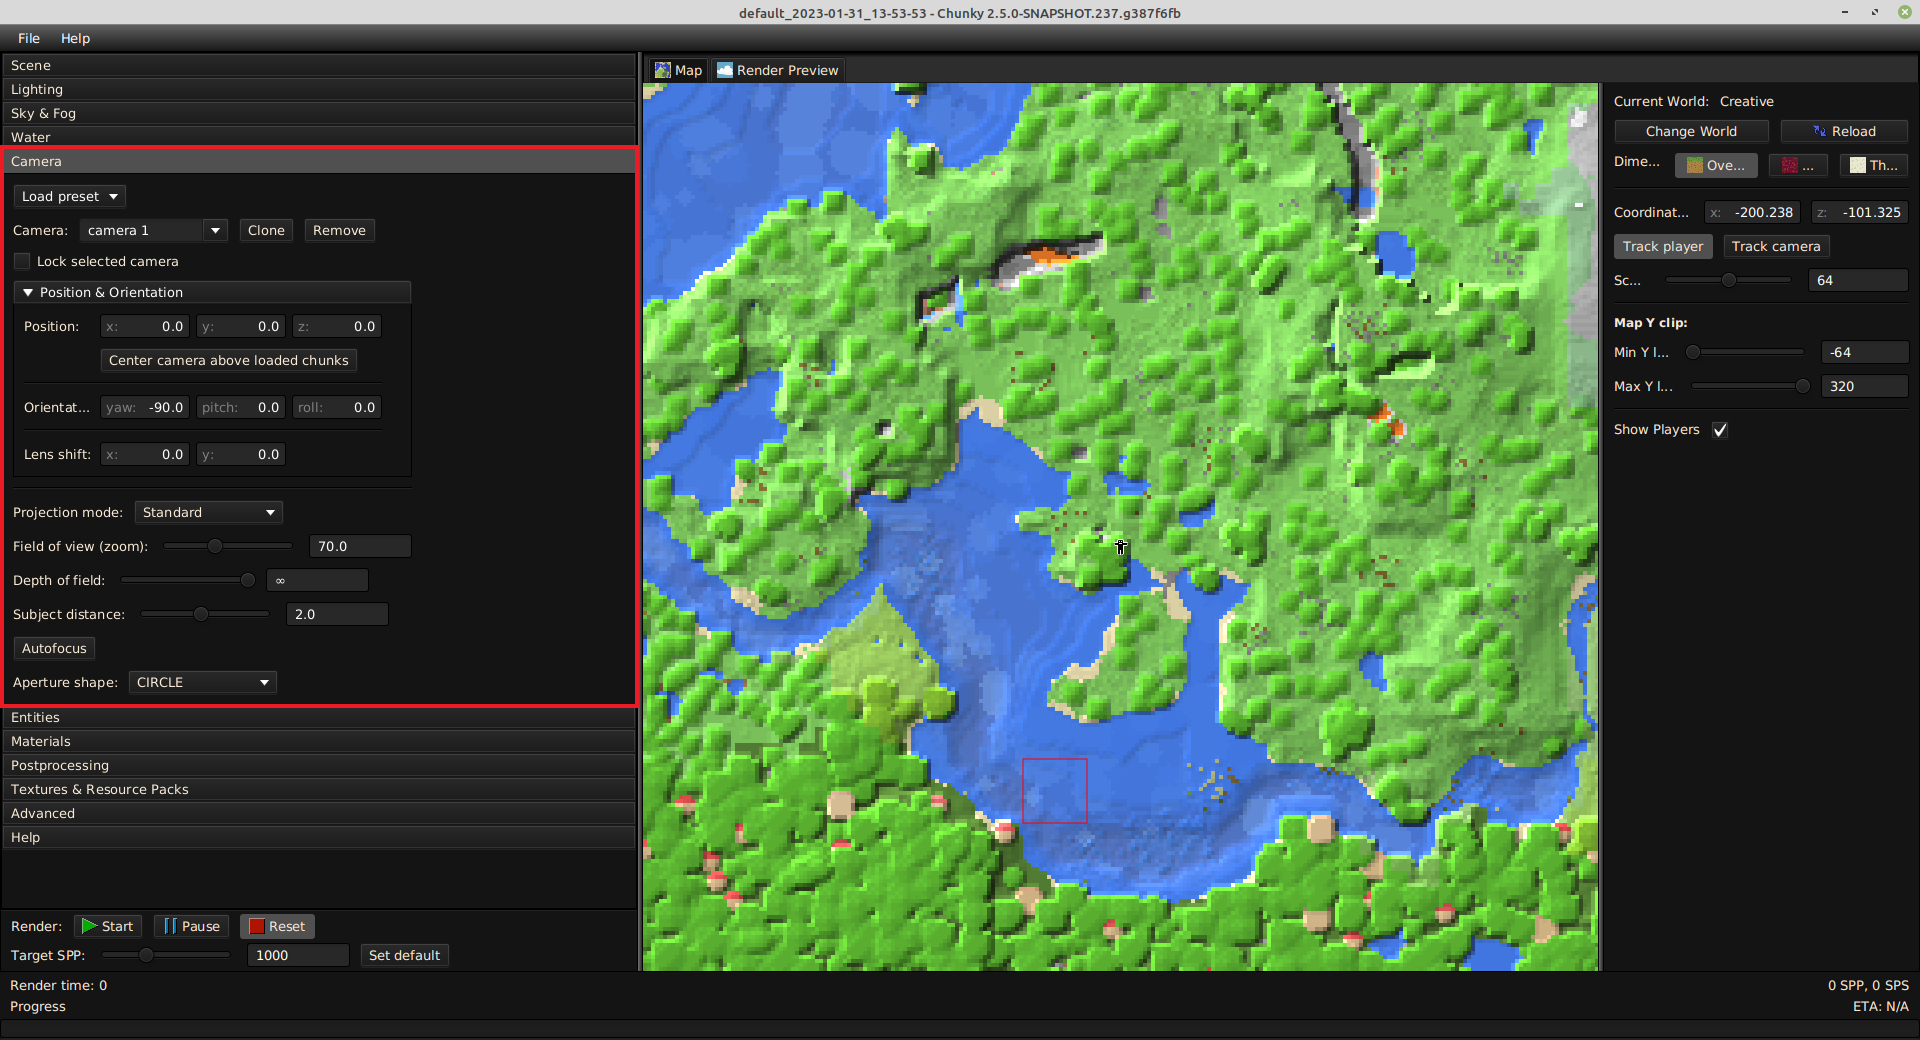
Figure 1: The Camera tab
-
Load preset: Dropdown menu to select a camera preset to load for the selected camera.
-
 Isometric West-North (North-West): Sets the Projection mode of the selected camera to Parallel, and points the camera North-West with an altitude angle of 45 degrees below the horizon.
 -
 Isometric North-East: Sets the Projection mode of the selected camera to Parallel, and points the camera North-East with an altitude angle of 45 degrees below the horizon.
 -
 Isometric East-South (South-East): Sets the Projection mode of the selected camera to Parallel, and points the camera South-East with an altitude angle of 45 degrees below the horizon.
 -
 Isometric South-West: Sets the Projection mode of the selected camera to Parallel, and points the camera South-West with an altitude angle of 45 degrees below the horizon.
 -
 Skybox Right: Sets the Projection mode of the selected camera to Standard, sets the camera Field of View (zoom) to 90, and points the camera East.
 -
 Skybox Left: Sets the Projection mode of the selected camera to Standard, sets the camera Field of View (zoom) to 90, and points the camera West.
 -
 Skybox Up: Sets the Projection mode of the selected camera to Standard, sets the camera Field of View (zoom) to 90, and points the camera upward, with North being at the bottom of the frame.
 -
 Skybox Down: Sets the Projection mode of the selected camera to Standard, sets the camera Field of View (zoom) to 90, and points the camera downward, with South being at the bottom of the frame.
 -
 Skybox Front (North): Sets the Projection mode of the selected camera to Standard, sets the camera Field of View (zoom) to 90, and points the camera North.
 -
 Skybox Back: Sets the Projection mode of the selected camera to Standard, sets the camera Field of View (zoom) to 90, and points the camera South.
-
-
Camera: Input field to set a name for the current camera. By clicking the button immediately to the right of the input field, a dropdown menu containing a list of all named cameras can be accessed. A camera can be switched to by clicking on its list entry.
-
Clone: Creates a copy of the currently-selected camera.
-
Remove: Removes the currently-selected camera from the list.
-
Lock selected camera: Disables all controls that change the camera view, including render preview camera controls, for the selected camera.
Position and Orientation Controls
-
Position & Orientation: Collapsible panel that contains controls to change the position, orientation, and lens shift of the selected camera.
-
Position: Input fields to change the location of the selected camera.
-
x: Input field to change the X-coordinate of the selected camera.
-
y: Input field to change the Y-coordinate of the selected camera.
-
z: Input field to change the Z-coordinate of the selected camera.
-
Center camera above loaded chunks: Moves the selected camera to the center of the loaded chunks.
-
-
Orientation: Input fields to change the orientation of the selected camera.
-
yaw: Input field to change the yaw of the selected camera, in degrees, from a reference direction of West.
-
pitch: Input field to change the pitch of the selected camera, in degrees, from a reference direction of downwards.
-
roll: Input field to change the roll of the selected camera, in degrees, from a reference orientation of upright.
-
-
Lens shift: Input fields to change the lens shift of the selected camera, relative to the canvas height. Figure 2 displays an example of the effect of lens shift.
-
x: Input field to change the horizontal lens shift of the selected camera, relative to the canvas height.
-
y: Input field to change the vertical lens shift of the selected camera, relative to the canvas height.
-
-
Camera Projection Controls
-
Projection mode: Dropdown menu to select the camera projection type for the selected camera. Figure 3 shows a comparison of the different camera projection modes.
-
Standard: Sets the selected camera to use pinhole projection, which is similar to how many cameras work, and is how Minecraft works.
-
Parallel: Sets the selected camera to use parallel projection, in which the camera is infinitely distant from the scene, and has an infinite focal length (zoom). This causes parallel lines in the three-dimensional scene to remain parallel in the two-dimensional image, which causes all blocks to appear the same size, regardless of "distance" from the camera.
-
Fisheye: Sets the selected camera to use full-frame fisheye projection, which maps a portion of the surface of a sphere to a two-dimensional image.
-
Stereographic: Sets the selected camera to use stereographic projection, which is an alternative to fisheye projection that has less distortion at the edges of the image.
-
Panoramic (equirectangular): Sets the selected camera to use equirectangular projection, which maps a portion of the surface of a sphere to a two-dimensional image, transforming spherical coordinates into planar coordinates.
-
Panoramic (slot): Sets the selected camera to use slot panoramic projection, which behaves like a pinhole camera in the vertical direction, and like a fisheye camera in the horizontal direction.
-
Omni-directional Stereo (left eye): Sets the selected camera to use omni-directional stereo projection, which is identical to equirectangular projection, but with interpupillary distance factored in, to create distinct images for viewing on a VR system. This mode creates an image to be viewed by the left eye.
-
Omni-directional Stereo (right eye): Sets the selected camera to use omni-directional stereo projection. This mode creates an image to be viewed by the right eye.
-
Camera Focus Controls
-
Field of view (zoom): Changes the vertical field of view of the selected camera. Positive values beyond the range of the slider can be entered into the associated input field.
-
Depth of field: Changes the depth of field, measured in centimeters (100 centimeters = 1 meter = 1 block), of the selected camera.
-
Subject distance: Changes the distance to the focus point, measured in meters (blocks), of the selected camera. Only effective when Depth of field is not set to infinity.
-
Autofocus: Focuses the selected camera on the set target by setting the Subject distance to the distance to the set target and setting the Depth of field to the one hundredth of the square of the distance to the set target.
-
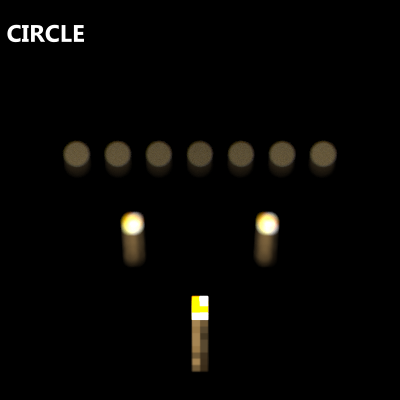
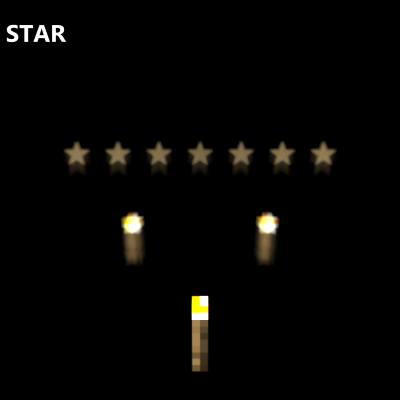
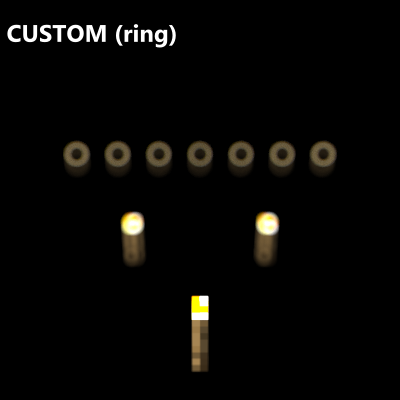
Aperture shape: Dropdown menu to change the shape of the aperture of the selected virtual camera. The effect of this is only apparent when Depth of field is not set to infinity. Figure 4 displays some examples of the effects of different aperture shapes.
-
CIRCLE
-
HEXAGON
-
PENTAGON
-
STAR
-
GAUSSIAN
-
CUSTOM: Opens a file explorer dialog box to browse for a PNG or JPG file that defines the custom aperture shape. The image must be square, and the aperture shape is defined by colors, with lighter colors allowing more light through and darker colors allowing less light through.
-
Figure 2: Using lens shift to achieve a tilt-shift effect to keep the portal borders parallel
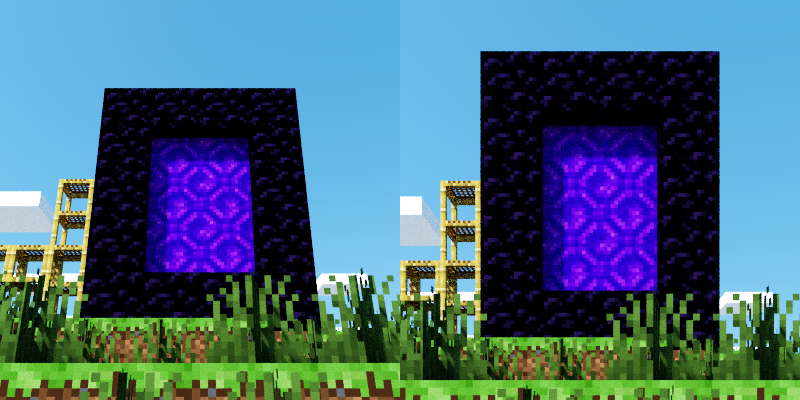
Figure 3: Comparison of the different camera projection modes, at their default FoV values and a canvas aspect ratio of 2:1.
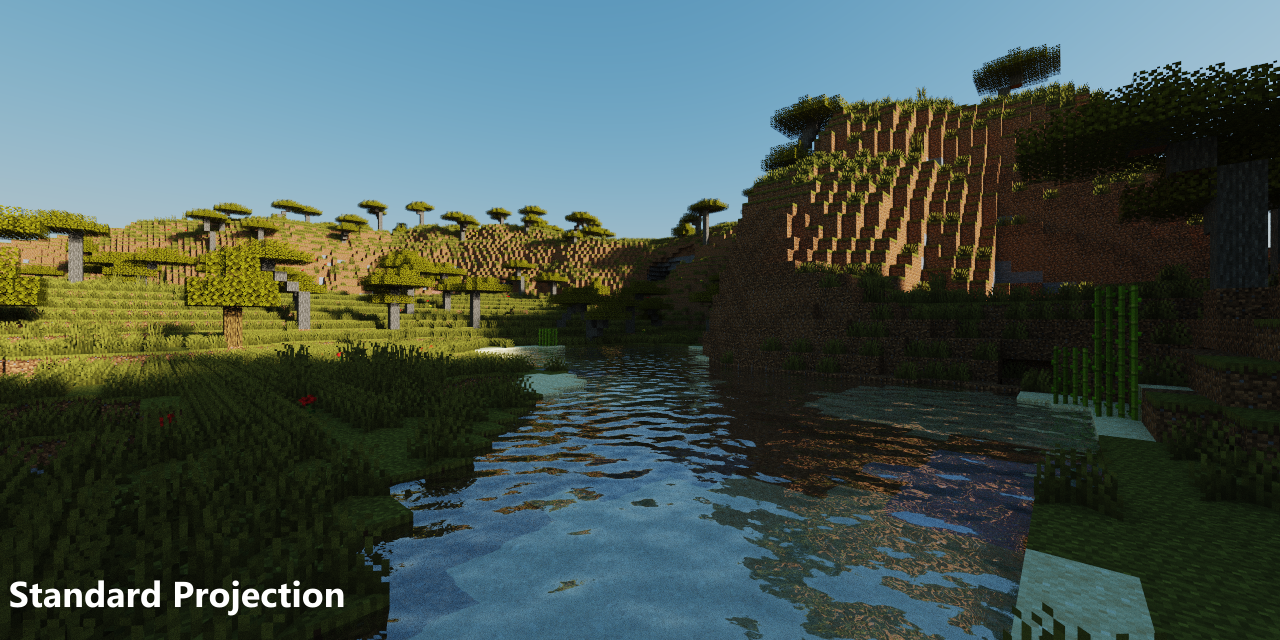
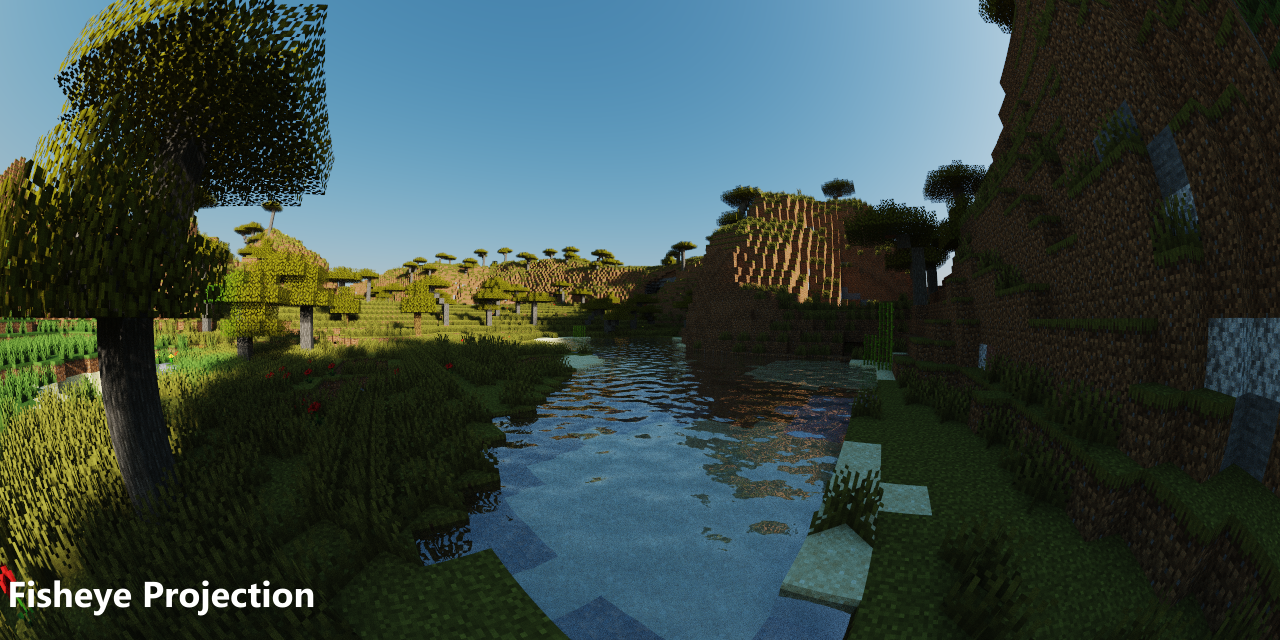
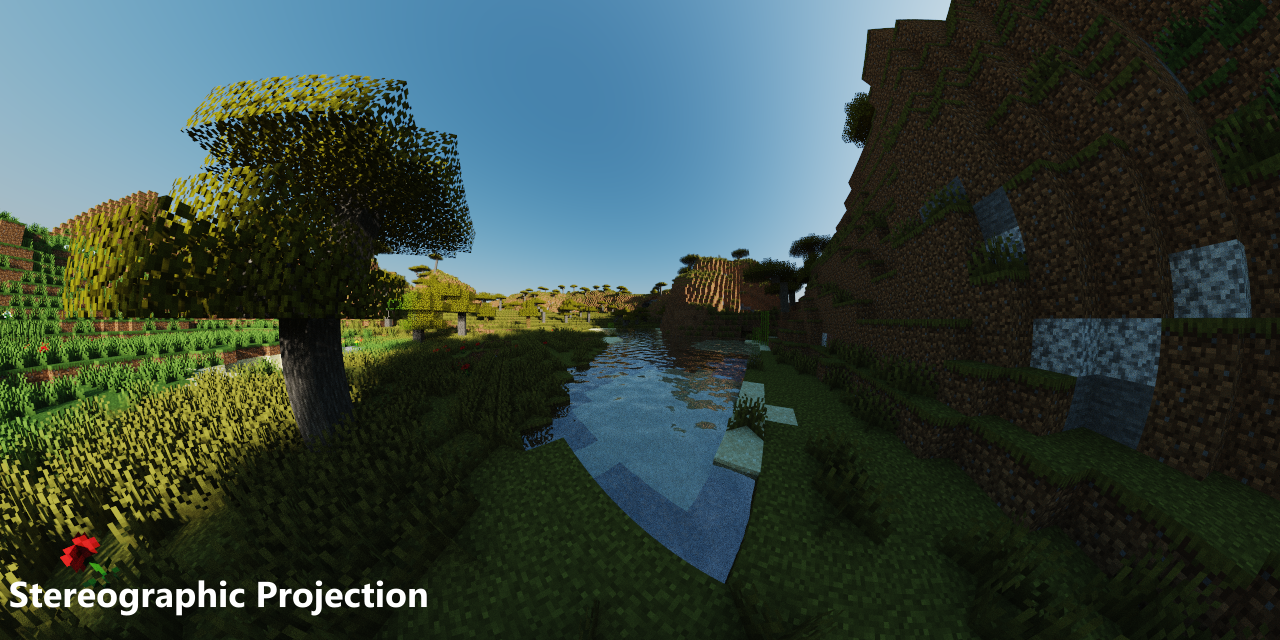
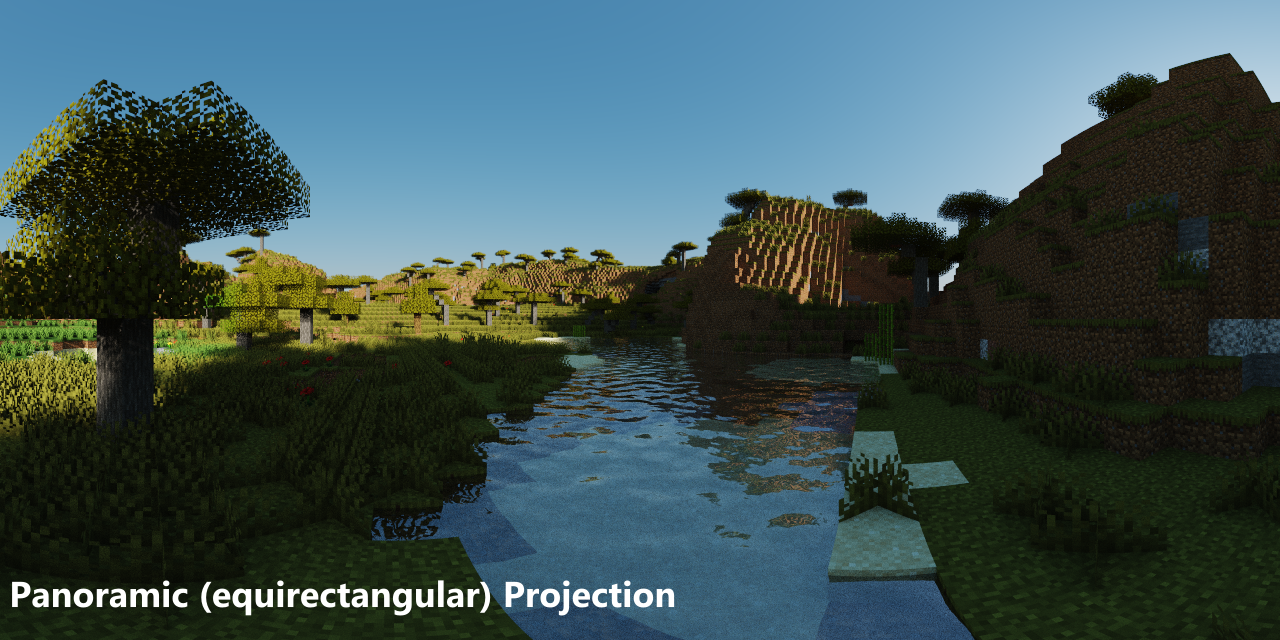
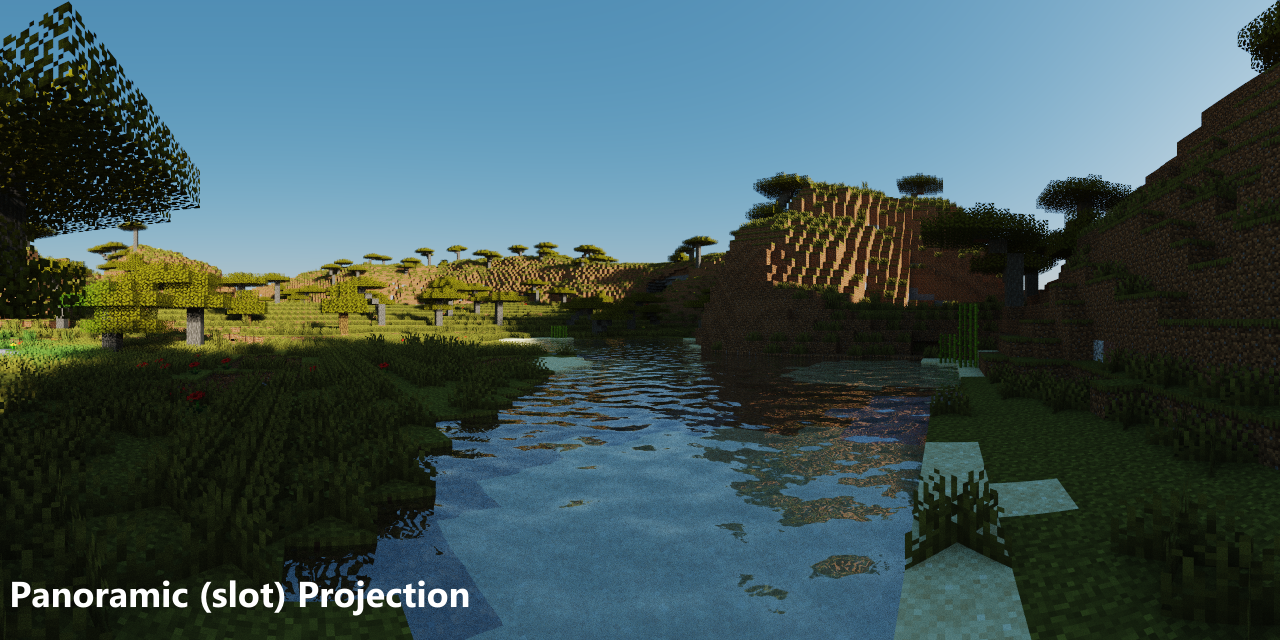
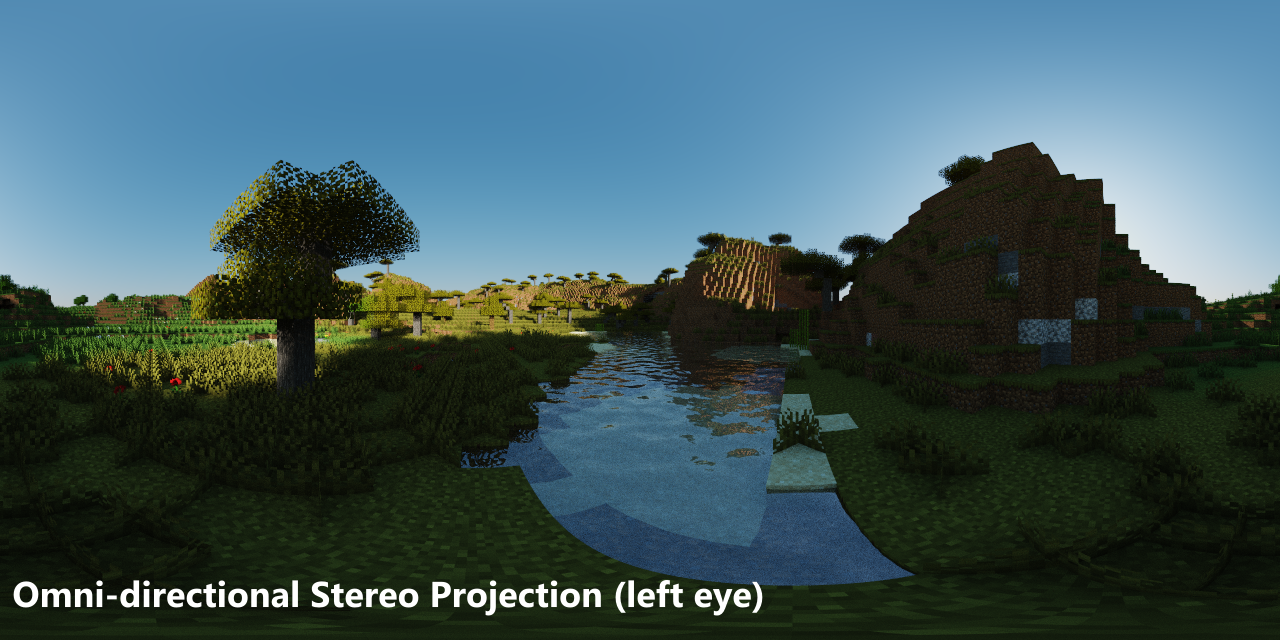
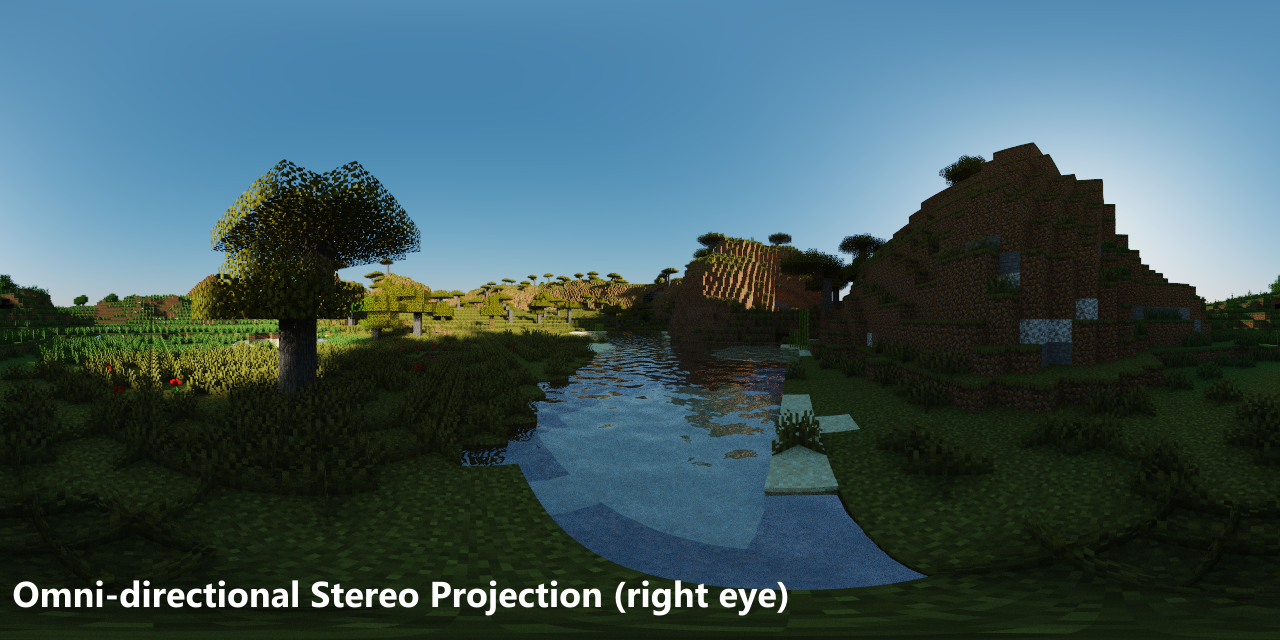
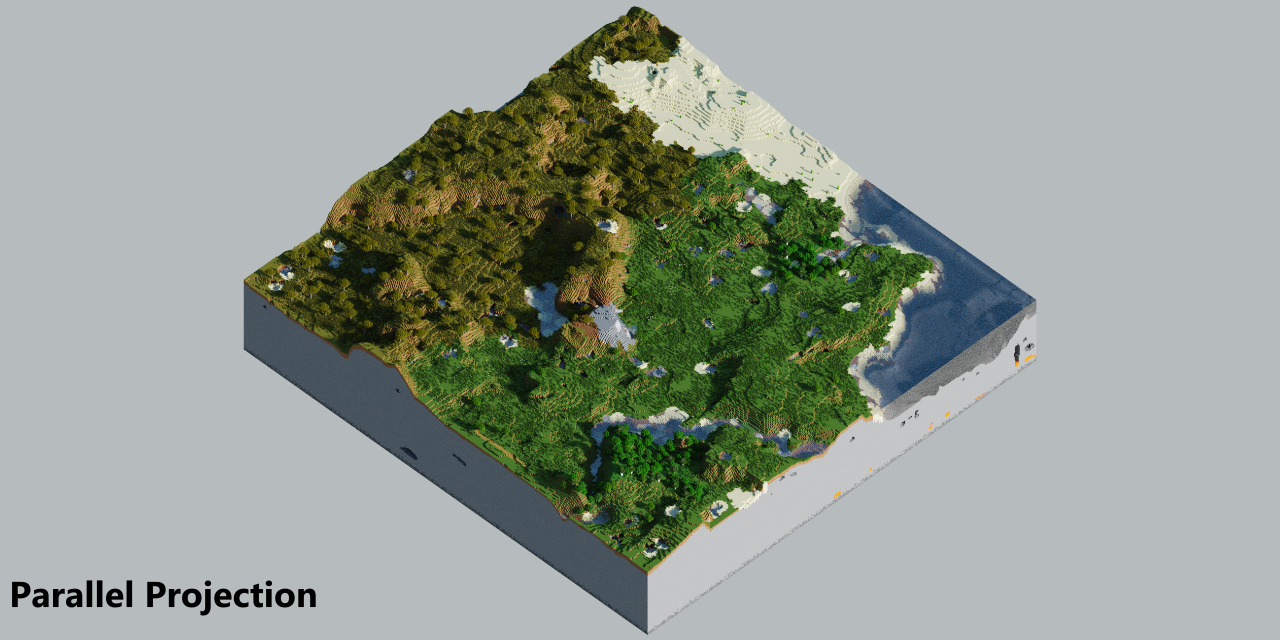
Figure 4: Comparison of different aperture shapes