Render Controls - Sky & Fog
The Sky & Fog tab contains controls for the appearance of the sky in the scene, and for fog.
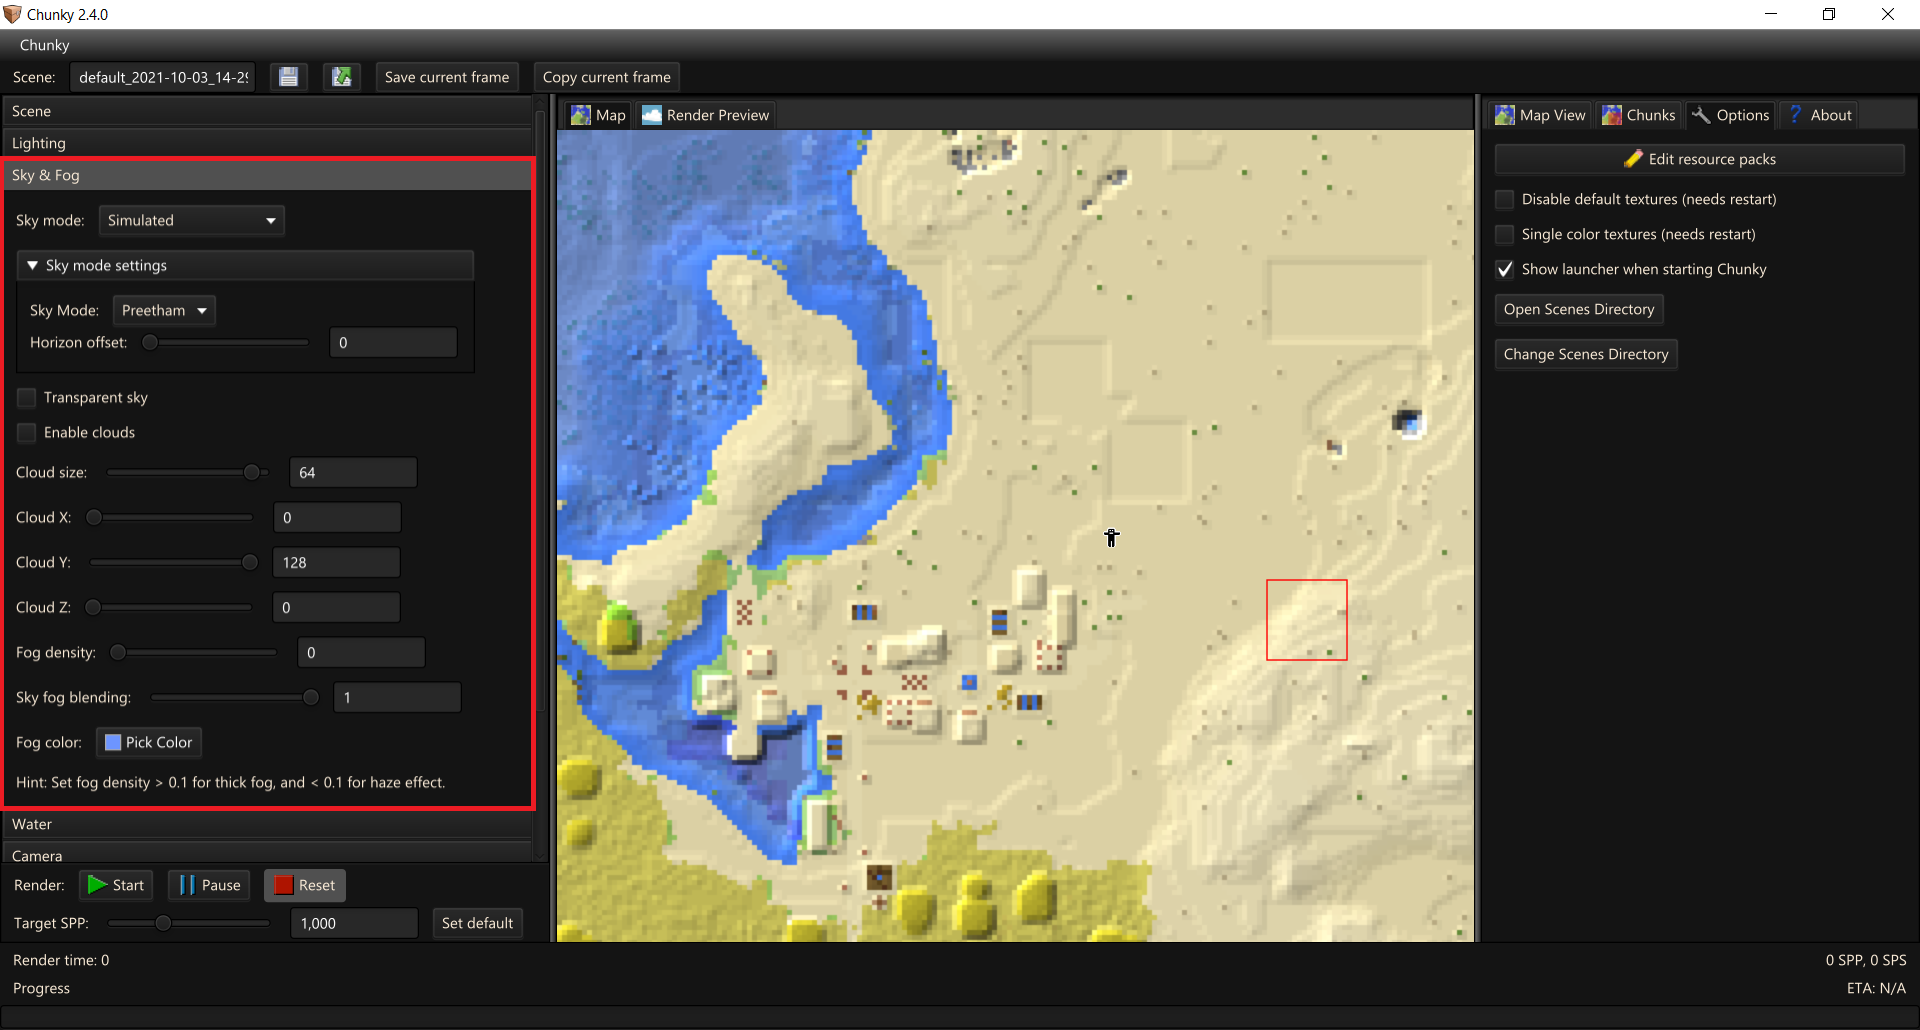
Figure 1: The Sky & Fog tab
-
Sky mode: Dropdown menu to select the type of sky to be used for the scene.
-
Simulated: Draws a simulated sky that changes according to the position of the sun in the sky.
-
Solid Color: Sets the entire sky to render as a single solid color.
-
Color Gradient: Draws the sky as a vertical gradient of colors.
-
Skymap (panoramic): Sets the sky to use an equirectangular skymap as its texture.
-
Skymap (spherical): Sets the sky to use a angular skymap as its texture.
-
Skybox: Sets the sky to use up to six separate images as textures of the faces of a virtual cube surrounding the scene.
-
Black: Sets the color of the entire sky to black.
-
Sky Mode Settings
Simulated
-
Sky Mode: Dropdown menu to select the simulation model for the sky.
-
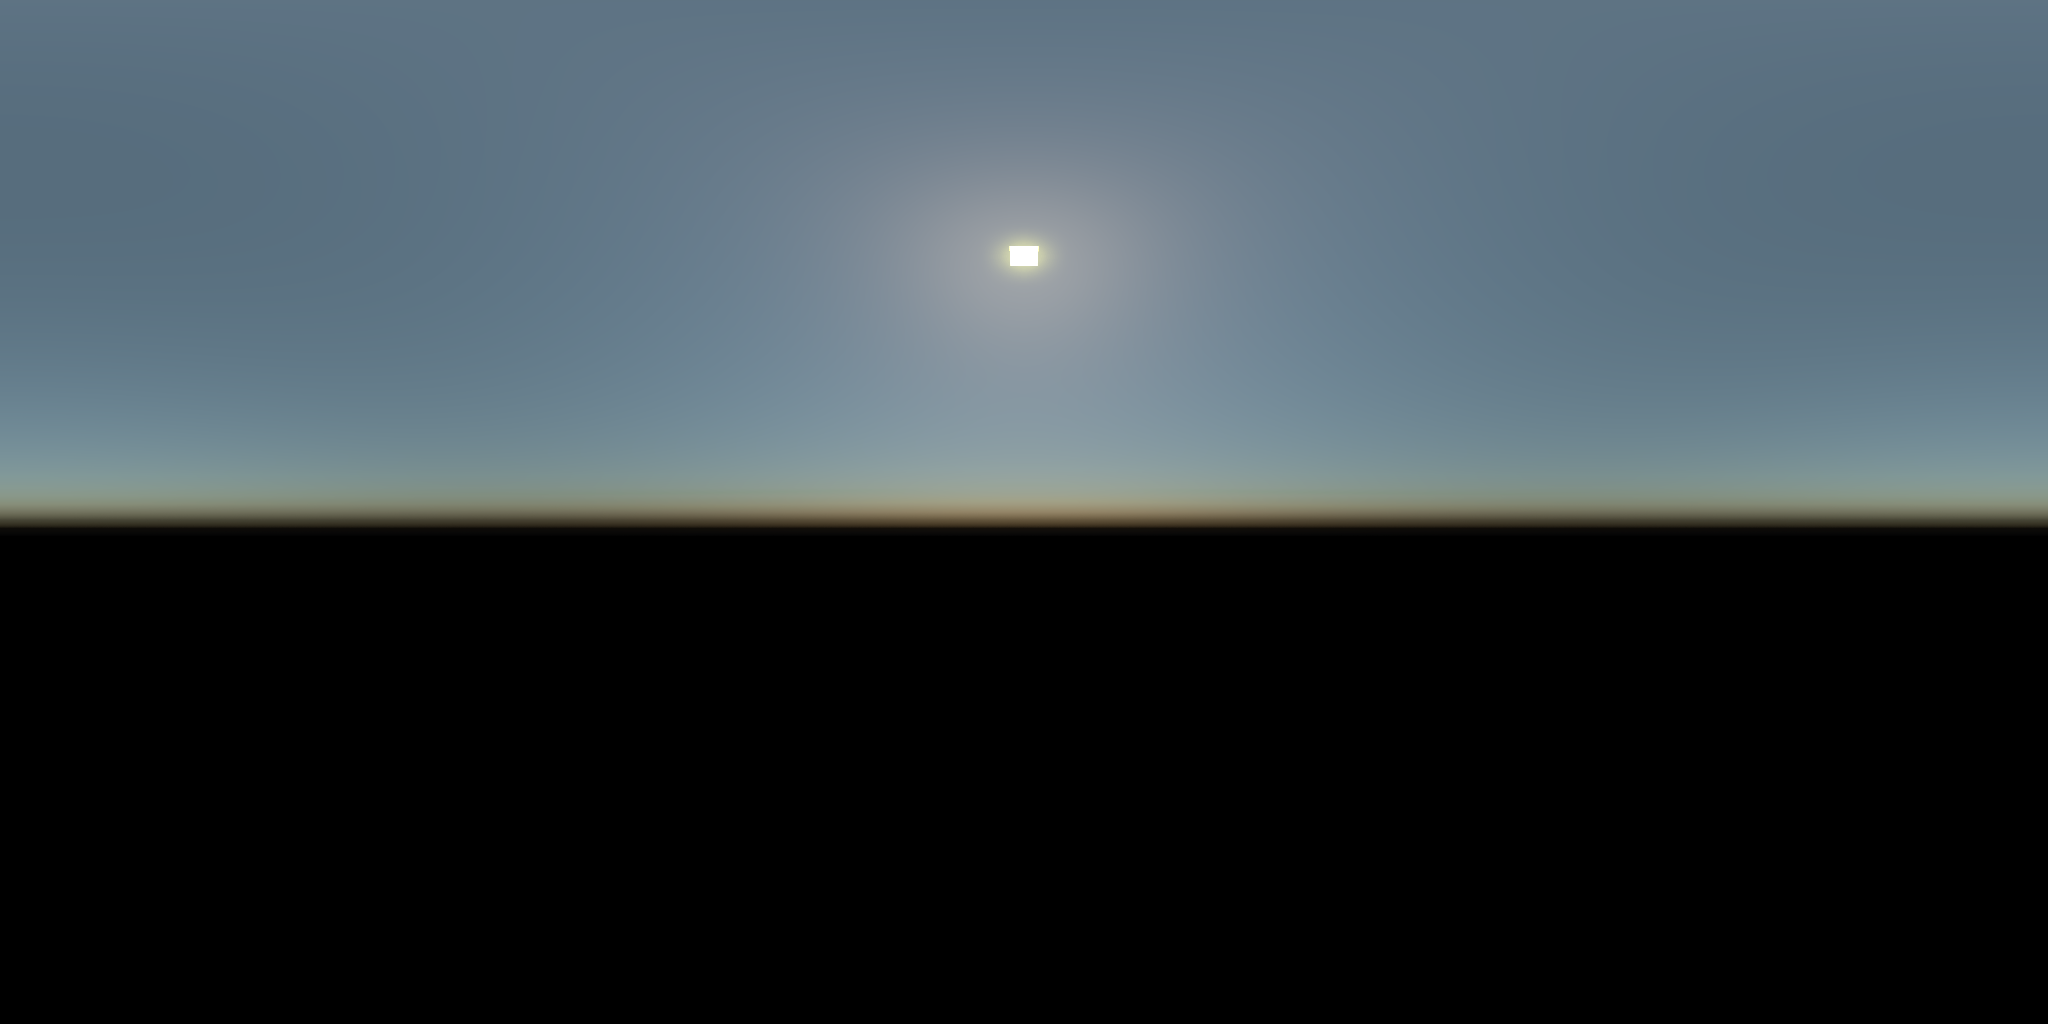
Preetham: A faster simulation of daytime skies. It is more similar to the Minecraft sky. An example panorama of the Preetham sky is displayed in Figure 3.
-
Nishita: A slower and more realistic sky simulation that can also simulate twilight. An example panorama of the Nishita sky is displayed in Figure 3.
-
-
Horizon offset: Offsets the simulated horizon downward from its default position.
Solid Color
- Pick Color: Opens a color selector dialog box to change the color of the sky and the light emitted from it.
Color Gradient
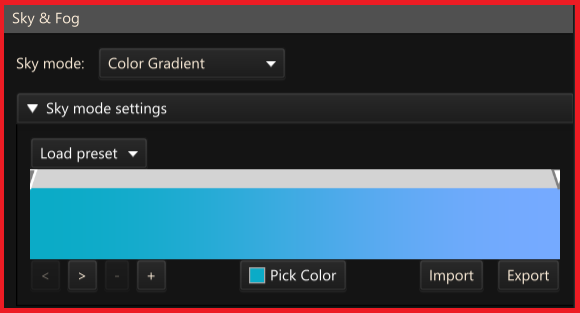
The color gradient editor, which is displayed in Figure 2, displays the currently-set color gradient, and has controls to change the color gradient. The editor contains color control markers, which set the color for a position on the gradient. Click any color control marker to select it for editing.
Figure 2: Color Gradient editor
-
Load preset: Dropdown menu to select a color gradient preset for the sky.
-
<: Switch the selected marker to the one immediately to the left.
-
>: Switch the selected marker to the one immediately to the right.
-
-: Removes the currently-selected marker.
-
+: Insert a new marker halfway between the currently-selected marker and the marker that is immediately to the right.
-
Pick Color: Opens a color selector dialog box to set the color for the currently-selected color control marker.
-
Import: Opens the 'Import Gradient' dialog box, which allows a JSON-formatted string of text that contains information describing the color gradient settings, usually one exported from the 'Gradient Export' dialog box, to be imported to immediately change the color gradient settings to the values described in the JSON string.
-
Export: Opens the 'Gradient Export' dialog box, which allows the current color gradient settings to be exported as a JSON-formatted string of text that describes the current color gradient settings.
Skymap (panoramic)
-
Load skymap: Opens a file explorer dialog box to browse for an image file (PNG, JPG, HDR, PFM) to be loaded as a skymap.
-
Vertical resolution: Changes how the skymap is displayed on the sky.
-
Half (mirrored): Stretches the skymap on the sky such that the bottom of the skymap is on the horizon and the skymap is mirrored below the horizon.
-
Full: Displays the skymap on the sky such that the whole skymap is stretched over the whole sky.
-
-
Skymap rotation: Changes the horizontal rotation of the skymap.
For more information about skymaps, read the Skymaps article.
Skymap (spherical)
-
Load skymap: Opens a file explorer dialog box to browse for an image file (PNG, JPG, HDR, PFM) to be loaded as a skymap.
-
Skymap rotation: Changes the horizontal rotation of the skymap.
Skybox
-
Load skybox textures:
-
Up: Opens a file explorer dialog box to browse for an image file (PNG, JPG, HDR, PFM) to be loaded as the top face of the skybox.
-
Down: Opens a file explorer dialog box to browse for an image file (PNG, JPG, HDR, PFM) to be loaded as the bottom face of the skybox.
-
Front: Opens a file explorer dialog box to browse for an image file (PNG, JPG, HDR, PFM) to be loaded as the front (North) face of the skybox.
-
Back: Opens a file explorer dialog box to browse for an image file (PNG, JPG, HDR, PFM) to be loaded as the back (South) face of the skybox.
-
Left: Opens a file explorer dialog box to browse for an image file (PNG, JPG, HDR, PFM) to be loaded as the left (West) face of the skybox.
-
Right: Opens a file explorer dialog box to browse for an image file (PNG, JPG, HDR, PFM) to be loaded as the right (East) face of the skybox.
-
-
Skybox rotation: Changes the horizontal rotation of the skybox.
Figure 3: Preetham sky and Nishita sky panoramas

- Transparent sky: Renders the sky as transparent (alpha = 100%). Note that this does not affect the lighting that the skymap emits, and only applies to direct ray hits on the sky.
Cloud Controls
-
Enable clouds: Toggles the existence of clouds similar to the 3D (Fancy graphics) clouds in Minecraft.
-
Cloud size: Changes the size of the clouds, which is measured in blocks per pixel of the clouds.png texture.
-
Cloud X: Changes the offset of the clouds on the X-axis in blocks.
-
Cloud Y: Changes the altitude of the clouds on the Y-axis.
-
Cloud Z: Changes the offset of the clouds on the Z-axis in blocks.
Fog Controls
-
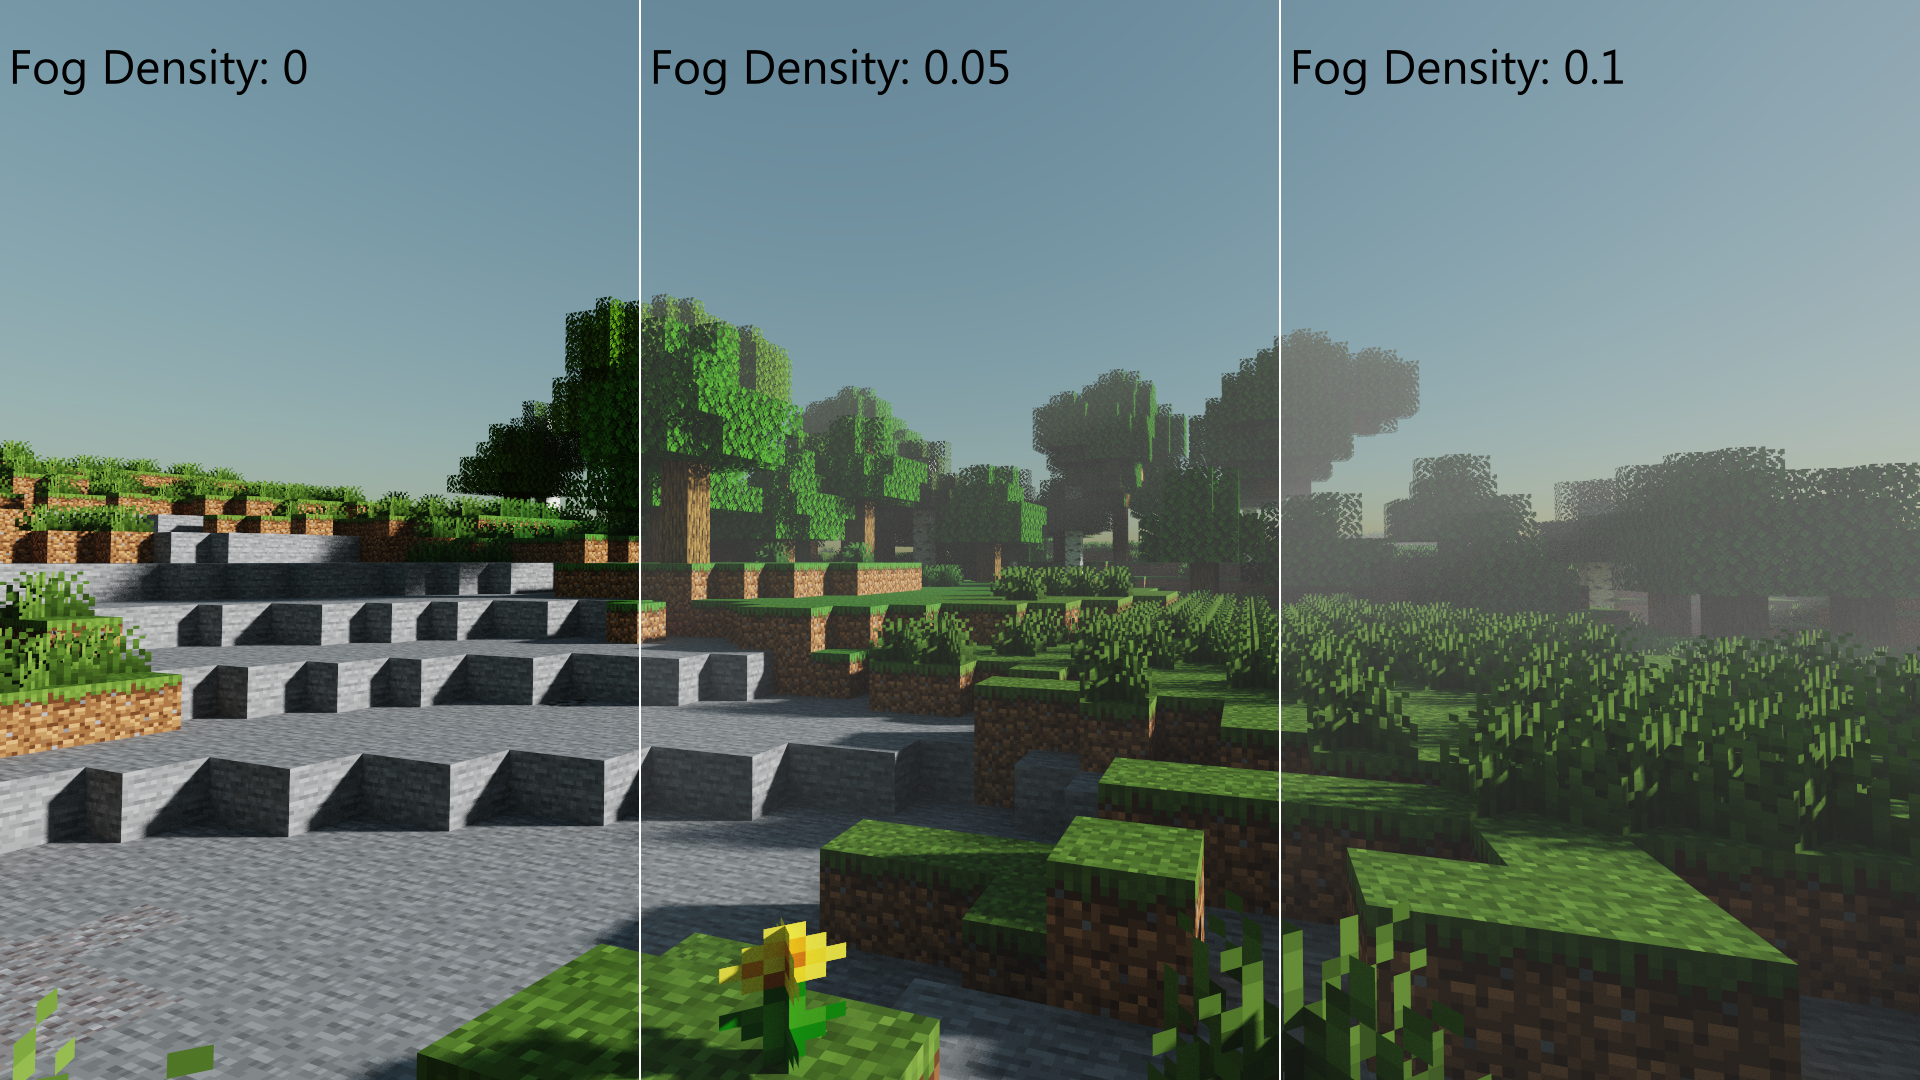
Fog density: Changes the density of the fog. A value of 0 disables fog completely. See Figure 4 for a comparison of different fog density levels.
-
Sky fog blending: Changes how much the fog is blended with the sky.
-
Fog color: Opens a color selector dialog box to change the color of the fog.
Figure 4: Comparison of different Fog density levels