Render Controls - Scene
The Scene tab contains general controls for Chunky and the scene.
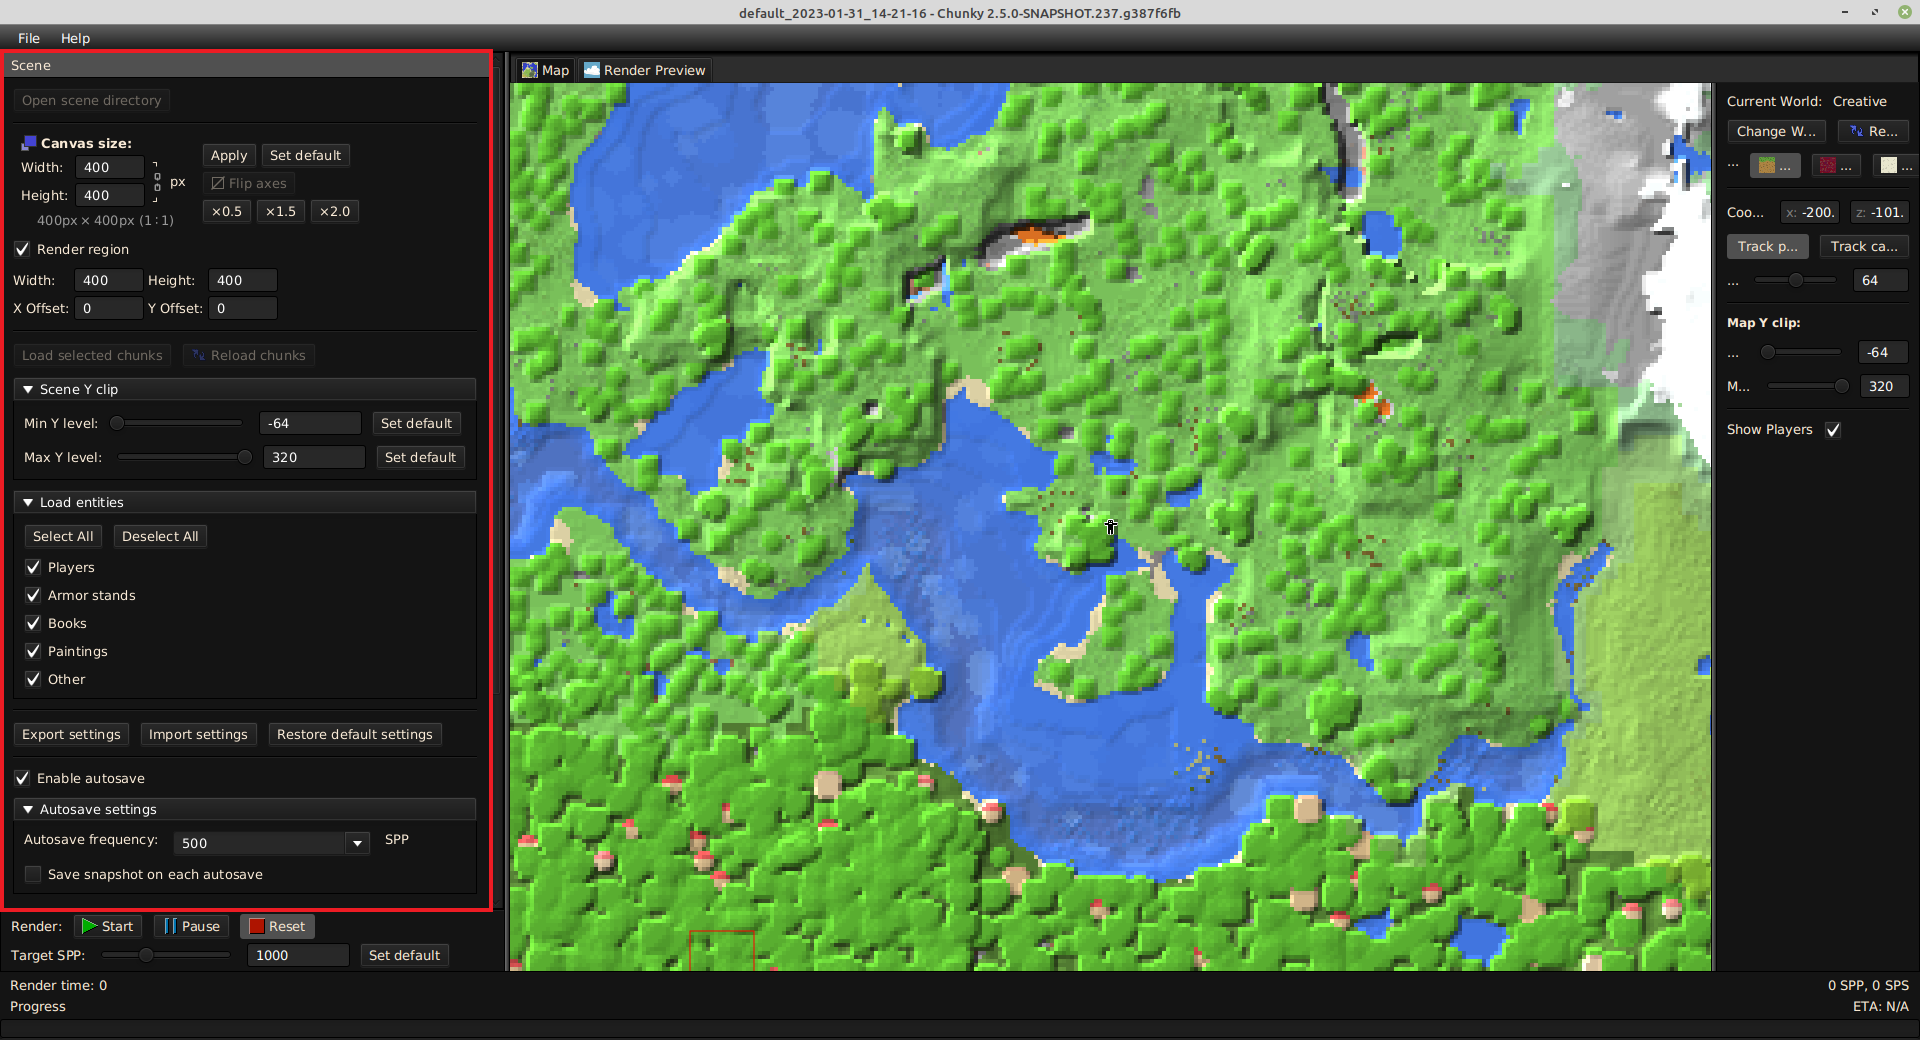
Figure 1: The Scene tab
- Open Scene Directory: Opens the directory of the currently-loaded scene, if any, or the directory in which Chunky stores scenes.
Canvas Controls
-
Canvas size: Input fields for the resolution of the render canvas.
-
Width: Input field for the horizontal dimension of the render canvas, measured in pixels.
-
Height: Input field for the vertical dimension of the render canvas, measured in pixels.
-
-
 /
/  Lock aspect ratio: Changes whether the aspect ratio of the render canvas is locked or unlocked . If the aspect ratio of the render canvas is locked, then changing one dimension of the resolution causes the other dimension to change proportionally to the other.
The resolution and aspect ratio of the render canvas are displayed directly below the input fields.
-
Apply: Applies the resolution specified in the input fields to the render canvas. Alternatively, press Enter while either input field is in focus.
-
Set default: Sets the resolution specified in the input fields as the default resolution for new scenes.
-
Flip axes: Inverts the dimensions of the render canvas, such that the measurement of the width of the render canvas becomes the measurement of the height of the render canvas, and the measurement of the height of the render canvas becomes the measurement of the width of the render canvas. This control is usable only if the aspect ratio of the render canvas is not 1:1.
-
x0.5: Multiplies each dimension of the resolution specified in the input fields by 0.5.
-
x1.5: Multiplies each dimension of the resolution specified in the input fields by 1.5.
-
x2: Multiplies each dimension of the resolution specified in the input fields by 2.
Render Region Controls
-
Render Region: Sets Chunky to render a region of the main render canvas, defined by the Width, Height, X Offset, and Y Offset controls.
-
Width: Input field for the width of the region to be rendered, measured in pixels.
-
Height: Input field for the height of the region to be rendered, measured in pixels.
-
X Offset: Input field for the horizontal offset of the region to be rendered from the left edge of the main render canvas, measured in pixels.
-
Y Offset: Input field for the vertical offset of the region to be rendered from the top edge of the main render canvas, measured in pixels.
World Loading Controls
-
Load selected chunks: Loads chunks selected in the map view.
-
Reload chunks: Reloads the chunks that are currently loaded.
-
Scene Y clip: Only blocks within the range specified by Min Y level and Max Y level will be loaded whenever Load selected chunks or Reload chunks is used.
-
Min Y level: Changes the minimum Y level of blocks to be loaded whenever Load selected chunks or Reload chunks is used. Values beyond the range of the slider can be entered into the associated input field.
-
Max Y level: Changes the maximum Y level of blocks to be loaded whenever Load selected chunks or Reload chunks is used. Values beyond the range of the slider can be entered into the associated input field.
-
Entity Loading Controls
-
Load entities: Collapsible panel that contains controls to select which types of entities are loaded upon scene creation.
-
Players: Deselecting this option does not cause any currently-loaded entities of this type to be unloaded when Load selected chunks or Reload chunks is next used. Such entities must be removed from the scene through use of the controls in the Entities tab.
-
Armor stands: Deselecting this option does not cause any currently-loaded entities of this type to be unloaded when Load selected chunks or Reload chunks is next used. Such entities must be removed from the scene through use of the controls in the Entities tab.
-
Books: Deselecting this option does not cause any currently-loaded entities of this type to be unloaded when Load selected chunks or Reload chunks is next used. Such entities must be removed from the scene through use of the controls in the Entities tab.
-
Paintings: Deselecting this option causes any currently-loaded entities of this type to be unloaded when Load selected chunks or Reload chunks is next used.
-
Other: "Entities" such as candle flames and campfires fall under this type. Deselecting this option causes any currently-loaded entities of this type to be unloaded when Load selected chunks or Reload chunks is next used.
-
-
Select All: Selects all items in the list.
-
Deselect All: Deselects all items in the list.
-
Export settings: Opens the 'Settings Export' dialog box.
-
Import settings: Opens the 'Settings Import' dialog box.
-
Restore default settings: Prompts the user to restore all scene settings to the defaults.
Autosave Settings
-
Enable autosave: Changes whether Chunky periodically saves the scene and saves a render dump of the current render progress.
-
Autosave frequency: Input field for number of SPP a multiple of which must be rendered to before the scene and a render dump of the scene should be saved. Alternatively, select one of six preset values from the dropdown menu, which is accessed by clicking the button immediately to the right of the input field.
-
50 SPP
-
100 SPP
-
500 SPP
-
1000 SPP
-
2500 SPP
-
5000 SPP
-
-
Save snapshot on each autosave: Changes whether Chunky saves a snapshot of the render progress on each autosave.
Settings Export
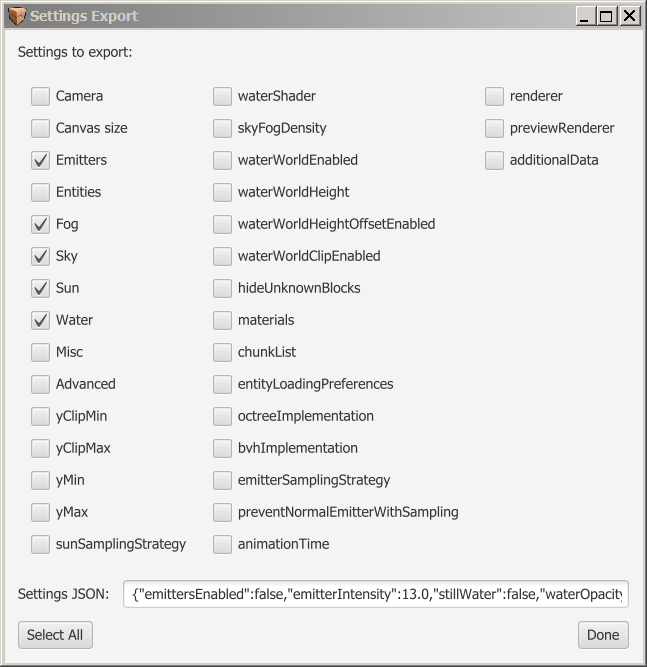
The 'Settings Export' dialog box, shown in Figure 2, allows information describing a choice of the currently-set Chunky settings to be exported as a JSON-formatted string of text.
Figure 2: 'Settings Export' dialog box
-
Settings to export: A list of settings which can be selected to be exported in the JSON string.
-
Settings JSON: Output field for the JSON-formatted string of text, the contents of which can be copied and saved for later.
-
Select All: Selects all settings in the Settings to export list.
-
Done: Closes the 'Settings Export' dialog box.
Settings Import
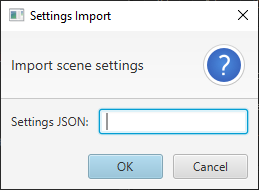
The 'Settings Import' dialog box, shown in Figure 3, allows a JSON-formatted string of text that contains information describing Chunky settings, usually one exported from the 'Settings Export' dialog box, to be imported to immediately change all settings described in the JSON string to the values corresponding to each setting described in the JSON string.
Figure 3: 'Settings Import' dialog box
-
Settings JSON: Input field for a JSON-formatted string of text that describes Chunky settings and their corresponding values.
-
OK: Applies the settings specified in the JSON string, if any, and closes the 'Settings Import' dialog box.
-
Cancel: Closes the 'Settings Import' dialog box without changing any settings.