Your First Render From Start To Finish
Info
This guide uses the Stable release of Chunky.
Installation
Please follow the Installation instructions.
Getting camera position
This part is for taking an in-game view and rendering it. Feel free to skip this part if you are more confident!
Open Minecraft, and load a world you wish to render. Move your player to the location of what you wish to render, and ensure that you are facing the right direction, too. Record the values of the fields outlined in red (shown in Figure 1). You will need these to position the camera correctly in Chunky. Save and quit your world.
Figure 1: Recording position and direction information in Minecraft

In this example, the coordinates and direction values are as follows: X = 32.2 ; Y = 71.7 ; Z = -232.7 ; Yaw = 67.5 ; Pitch = 8.2 (rounded to 1 decimal place).
Selecting Chunks
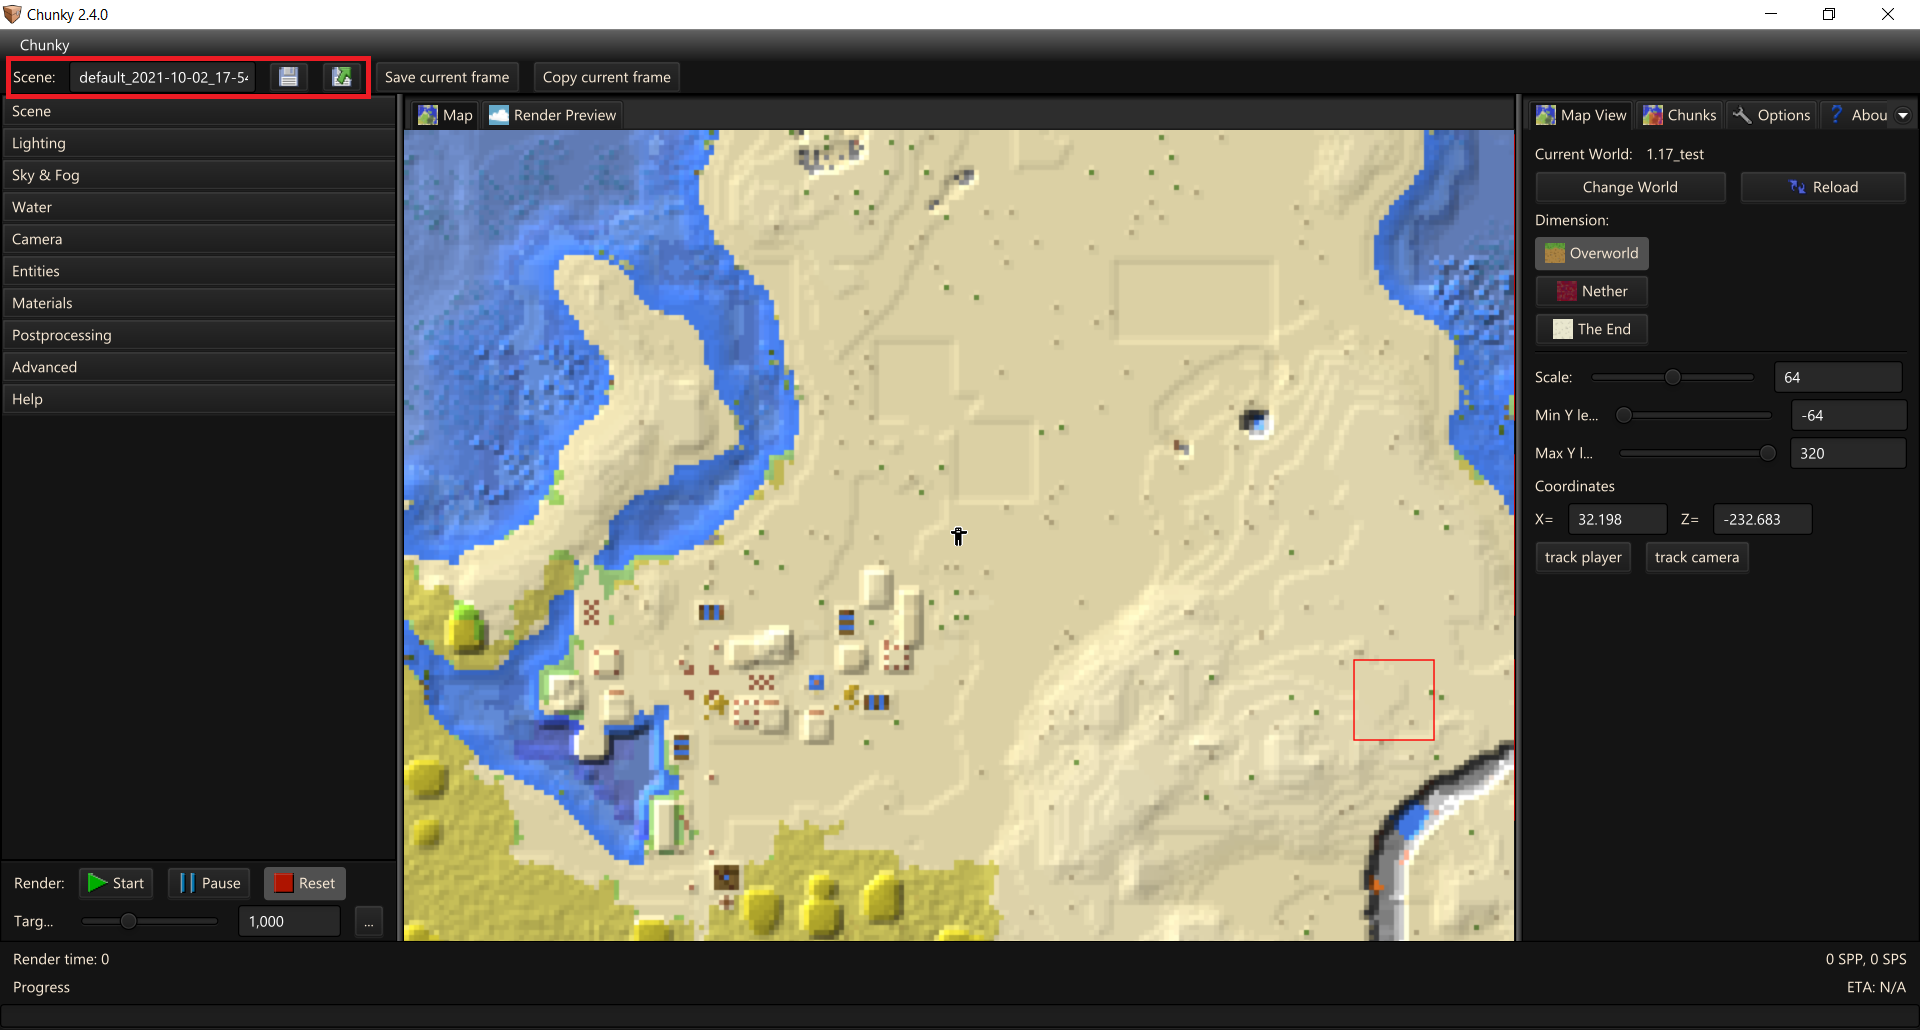
If Chunky isn't running yet, then launch it. You should see something like what is shown in Figure 2.
Figure 2: Chunky with no world loaded
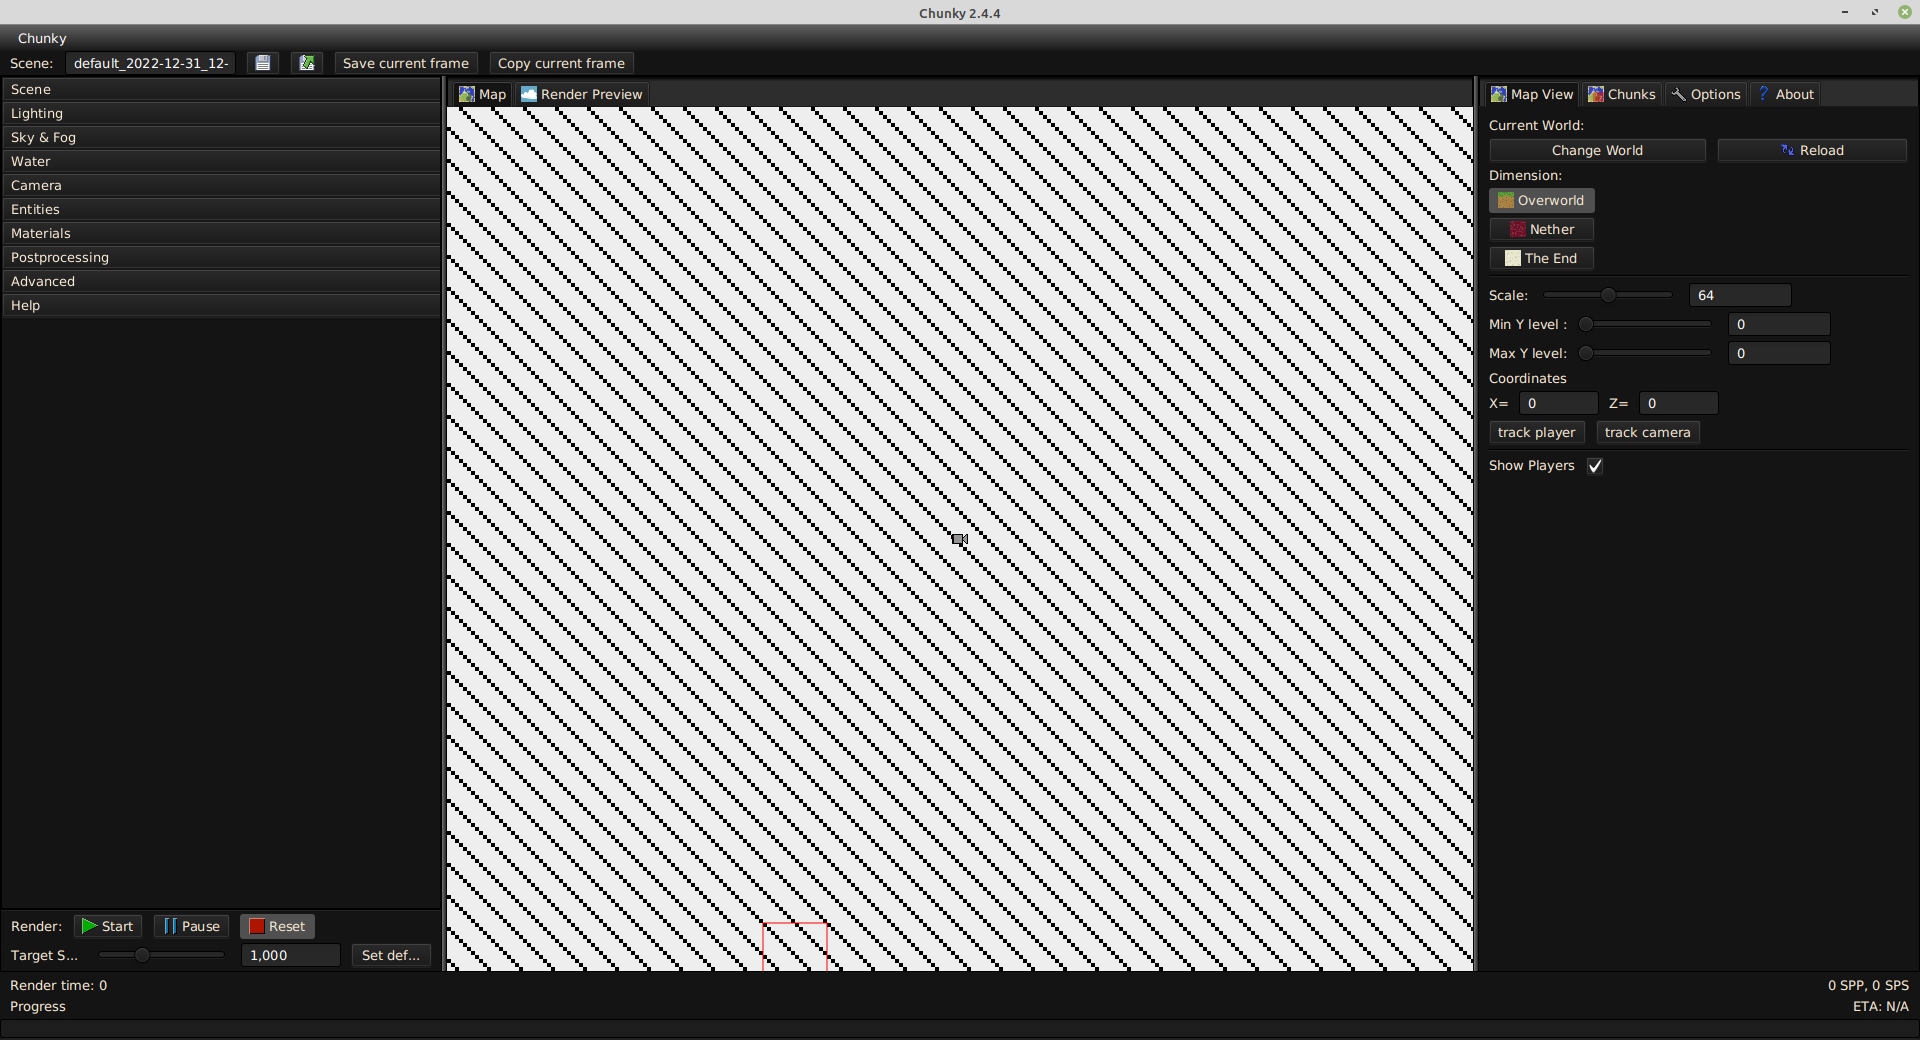
Currently, no world is loaded into Chunky. Click on Change World, located in the Map View tab in the right panel to select a world to load. You should be presented with a window like the one shown in Figure 3.
Figure 3: The world selection dialog box
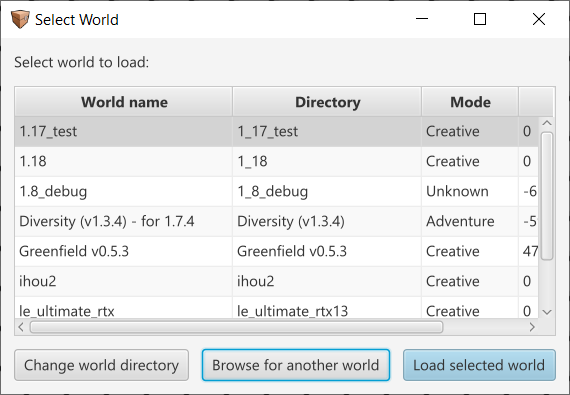
Once you have located the world, click on Load selected world. The Map tab will load an interactive map view of your world, as shown in Figure 4.
Figure 4: The map view of the loaded world
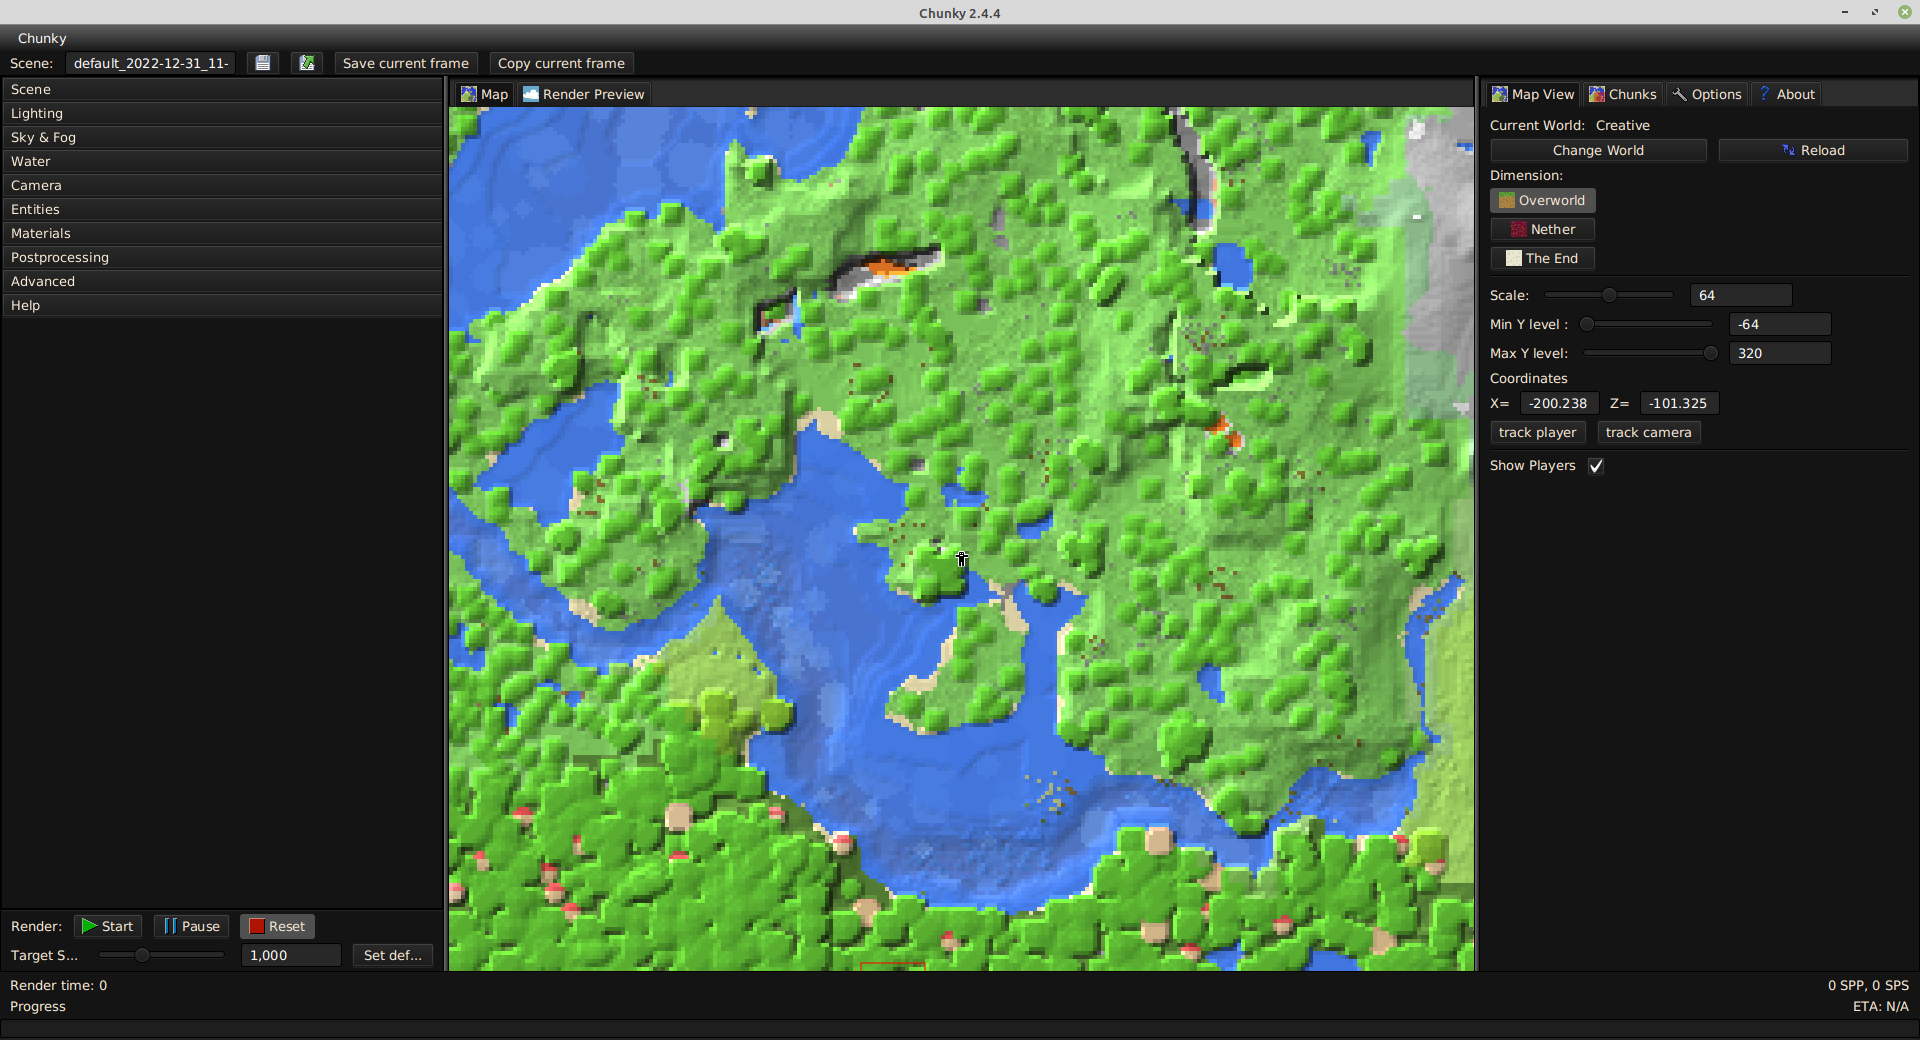
Select the dimension of your world that you want to render using the buttons in the right panel found in the Map View tab, and then select the chunks you wish to render using the controls listed below in the Map tab.
-
Left-click a chunk to select or deselect the chunk.
-
Hold Shift and Left-click and drag to select a rectangular area.
-
Hold Ctrl + Shift and Left-click and drag to deselect a rectangular area.
-
Left-click and drag to pan the map view across the world.
-
Zoom in and out using the scroll wheel.
-
Right-click to access a menu with a few options.
Selecting fewer chunks can decrease rendering time, but they will be completely missing from the render. Try to only select what the camera can see!
Setting up your render
This part of the process is where you can customize settings to your heart's content. The guide will only cover the absolute basics, so it is recommended to experiment.
Loading Chunks
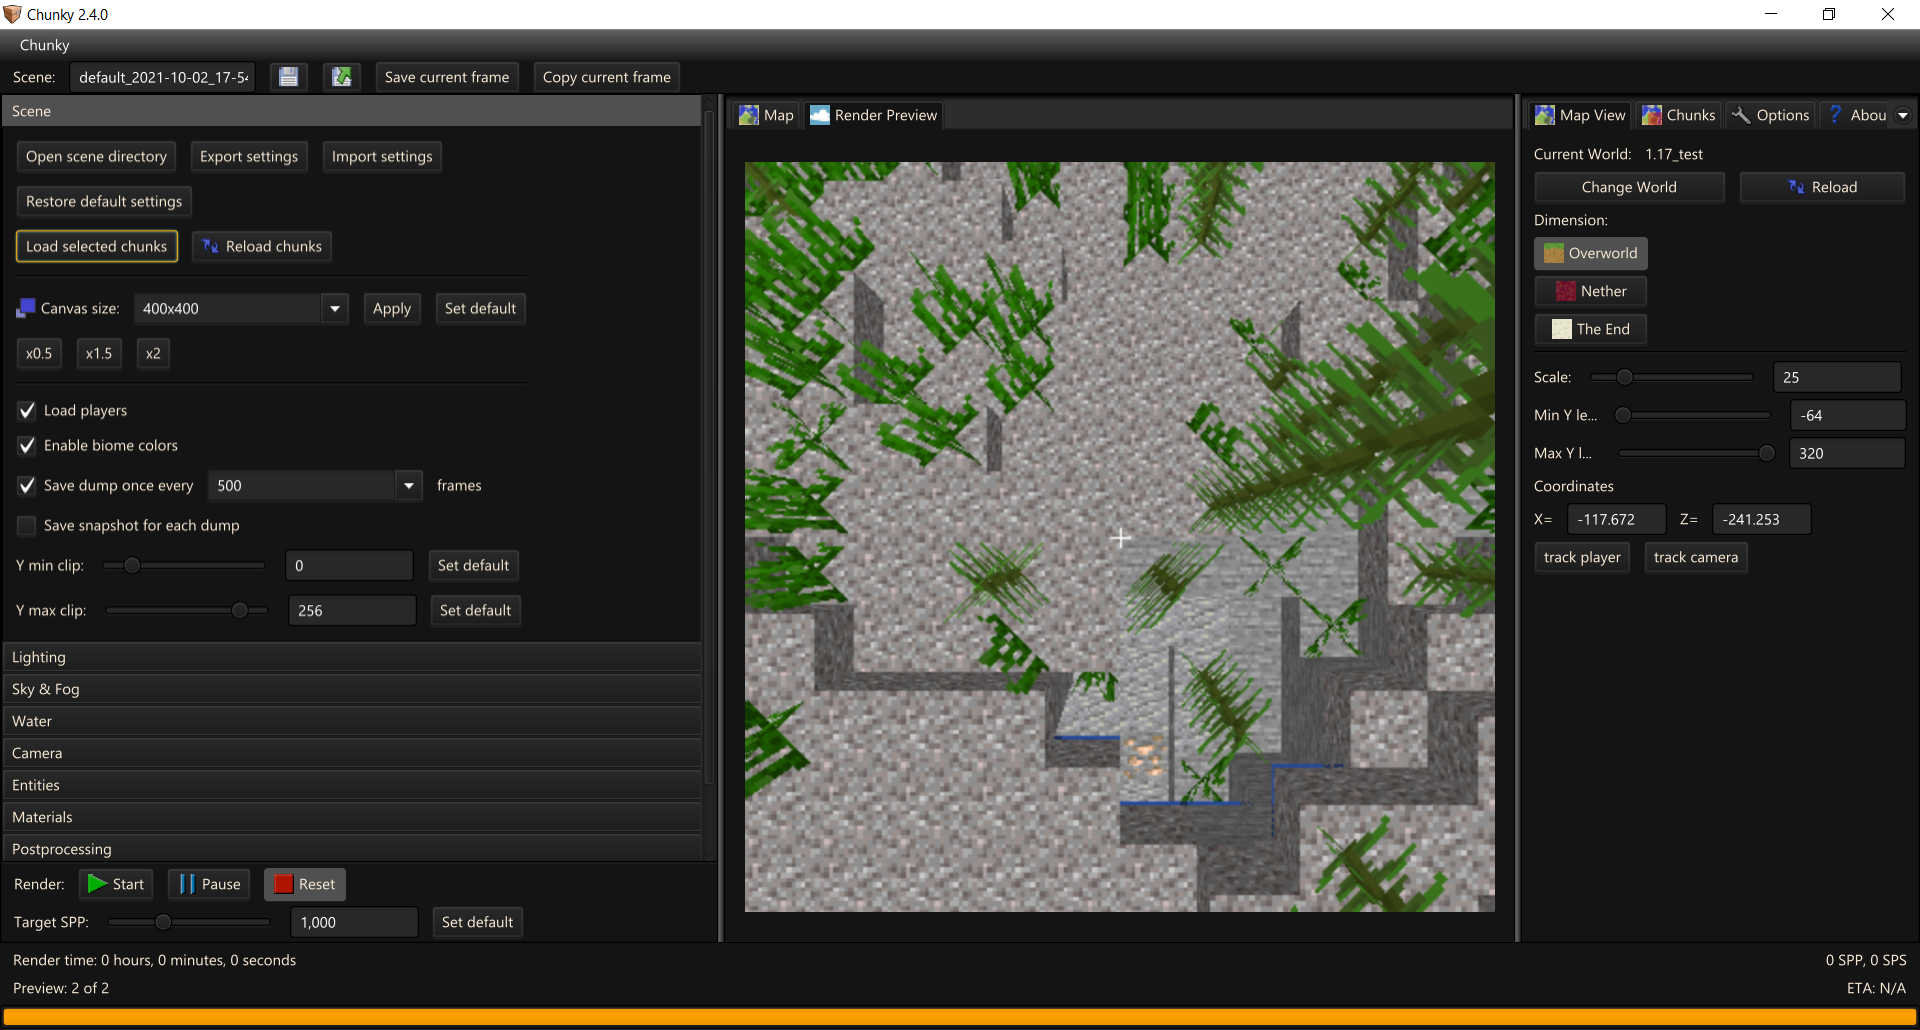
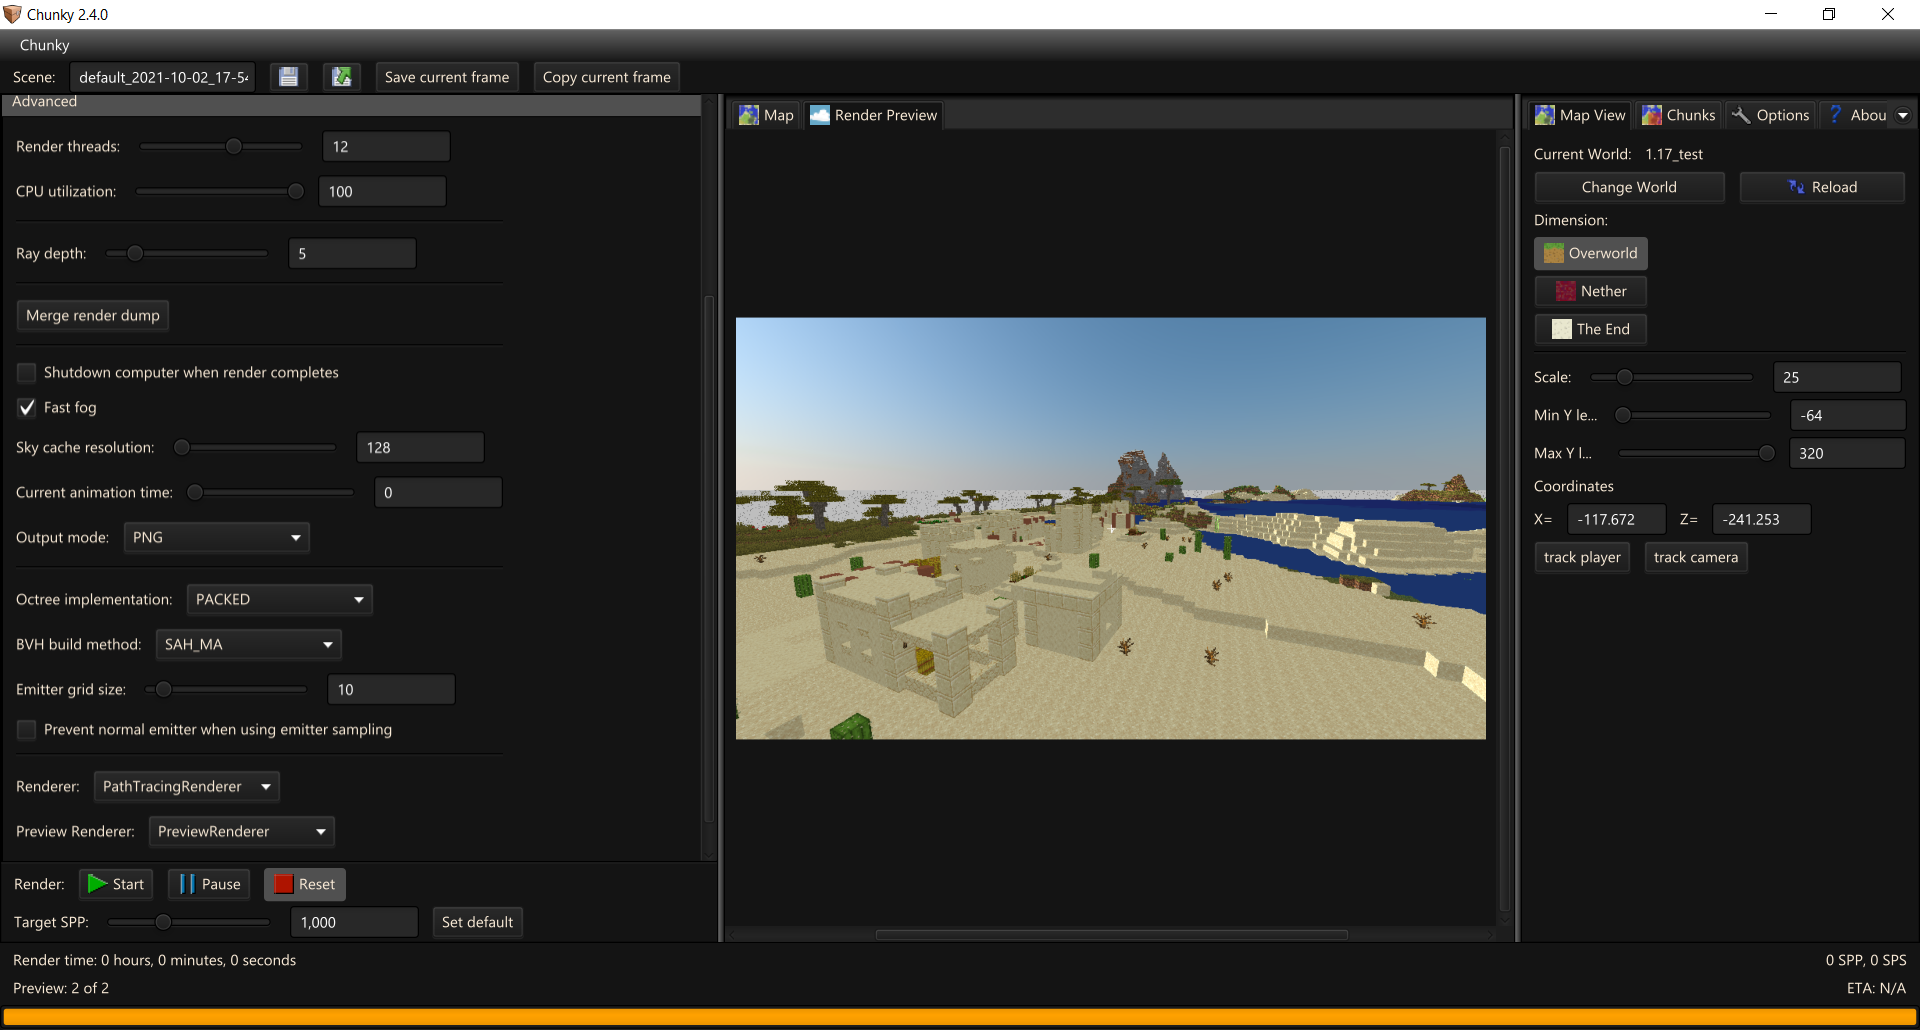
To load chunks, either right click on the map view located in the center panel and click on New scene from selection, or click on Load selected chunks, which is found in the Scene tab in the left panel, which contains render controls. After loading the selected chunks, the center panel should automatically switch to the Render Preview tab, which displays a 3D preview of the chunks selected from your world. The progress bar at the bottom should be filled. The time it takes to load the selected chunks increases with the number of chunks selected.
Figure 5: The render preview
A few settings to change...
There are a few options inside the Scene tab that you may wish to change.
Canvas size is the resolution you want the preview and the final render to be. Higher values take longer to render, so using a lower resolution, such as 960x540, can massively boost preview / test render performance. The x2 button can quickly double the measures of both dimensions to 1920x1080.
Save dump once every X is effectively an auto-save feature. Every time Chunky reaches an SPP value that is a multiple of X that you set, it will save your scene. Chunky will not render while dumping so do not set this too low unless you believe your system is unstable.
If you want to match the Chunky camera position to the player's position in-game, then Load entities > Players should be disabled.
Previewing
Pressing Start and allowing Chunky to render the scene for a few seconds to get an idea of how the render will look at the end is a good idea. You can always press Reset to return to changing settings.
Camera
Next, open the Camera tab.
Figure 6: The Camera tab
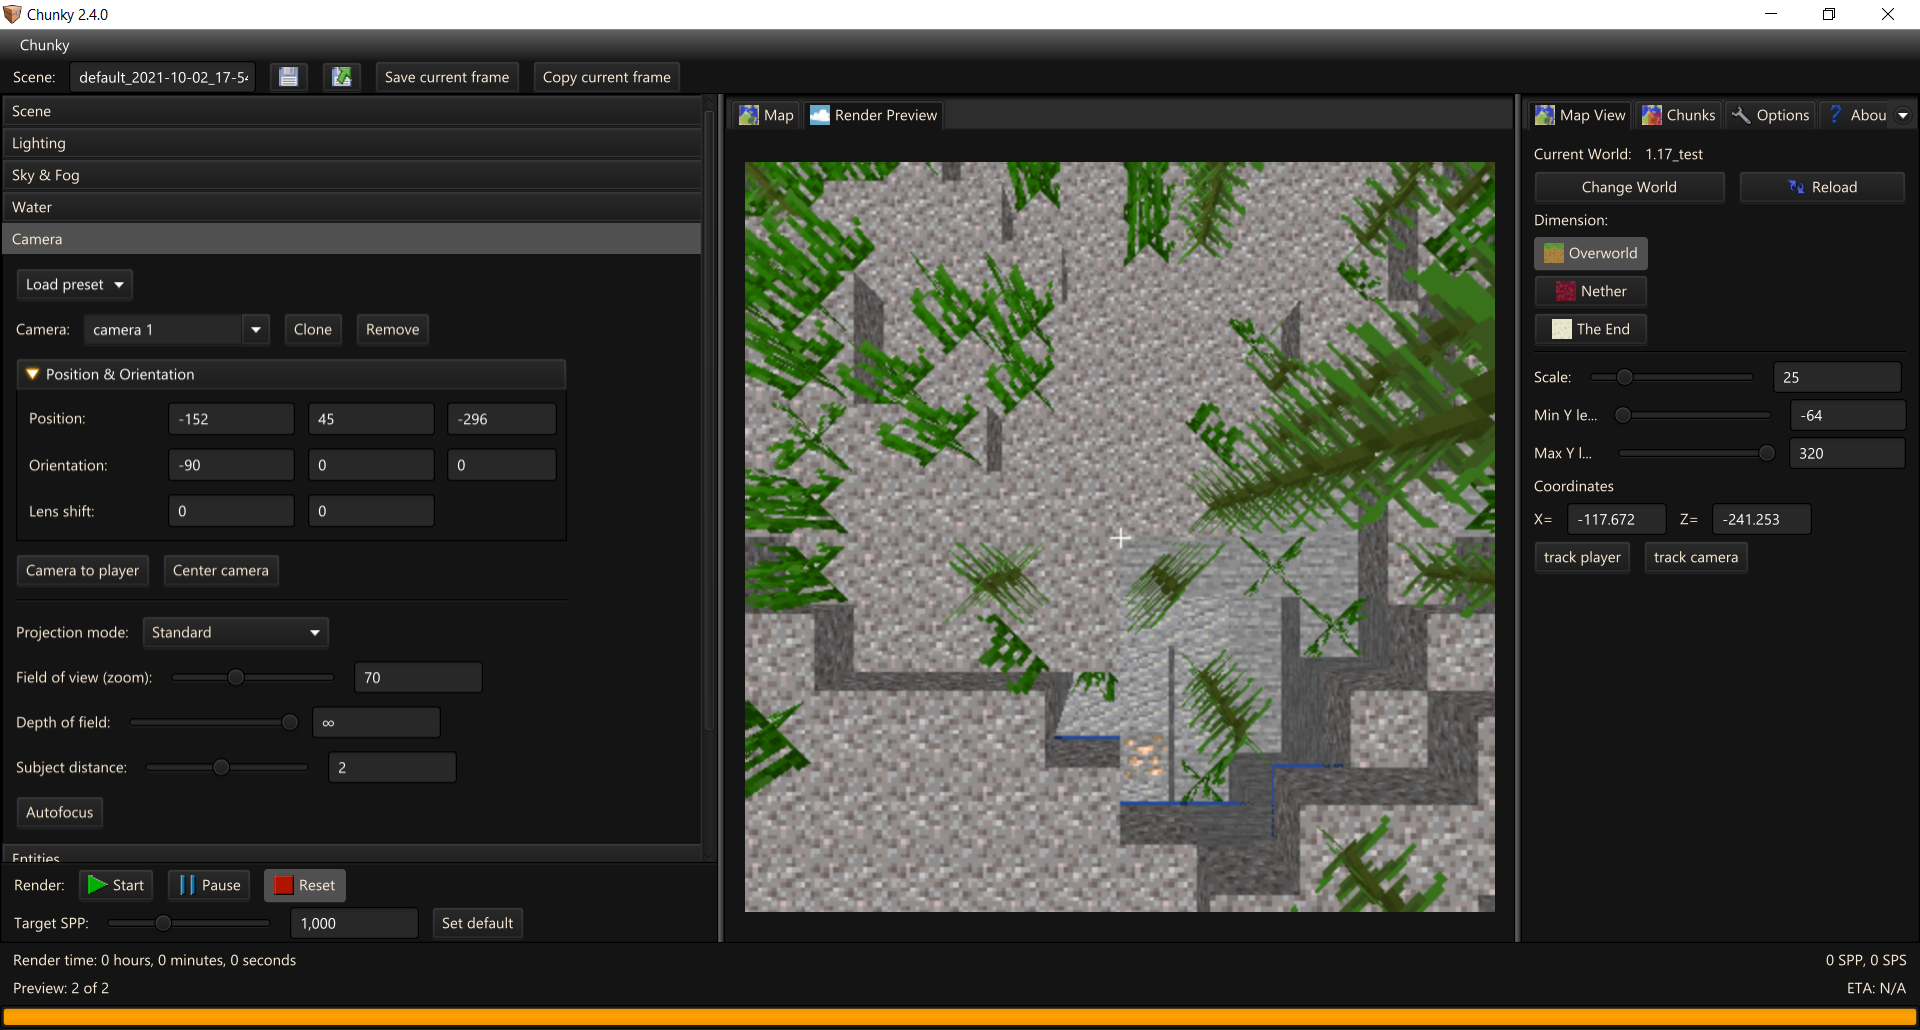
Click the Position & Orientation dropdown to expand it. Unfortunately, you cannot simply copy the values taken from the Minecraft debug screen. A few adjustments must be made first, because there are some differences that must be accounted for. Below is a set of conversions:
Chunky Camera X = Minecraft X
Chunky Camera Y = Minecraft Y + 1.62
Chunky Camera Z = Minecraft Z

Chunky Camera Yaw = 90 - Minecraft Yaw
Camera Pitch = Minecraft Pitch - 90
Using the above conversions with our example results in the following values:
Chunky Camera X = 32.2 ; Chunky Camera Y = 73.32 ; Z = -232.7 ; Yaw = 22.5 ; Pitch = -81.8
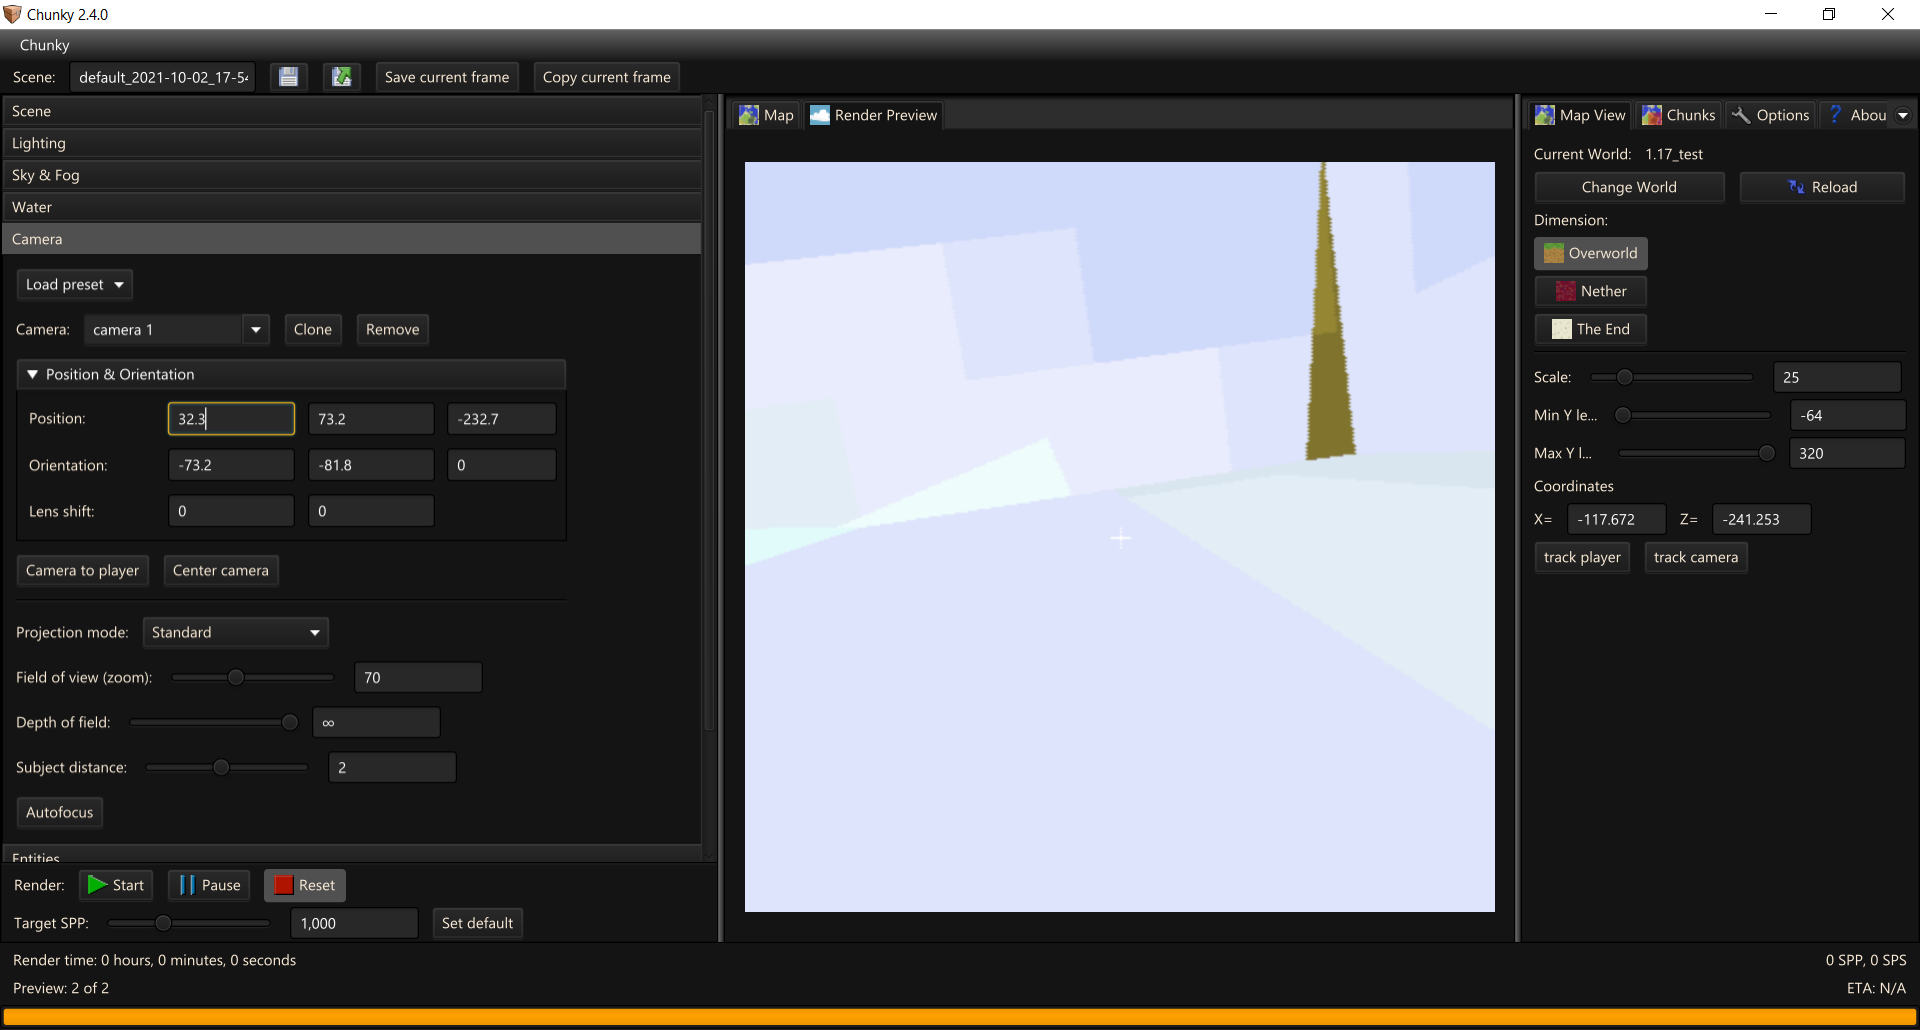
Enter the X-, Y-, and Z-coordinates for the camera into the three input fields on the Position row, pressing the Enter key after each one. Do the same with the Camera pitch and yaw values, but place them into the first two input fields of the Orientation row, pressing the Enter key after each one. If Load entities > Players in the Scene tab was enabled when you clicked Load selected chunks, then the camera may clip into the player after you enter the values, as shown in Figure 7.
Figure 7: Camera clipping into player
To remove the player, open the Entities tab, select the player which the camera is clipping into (likely the first and only one on the list), and then press the - button.
Figure 8: Player removed from the scene
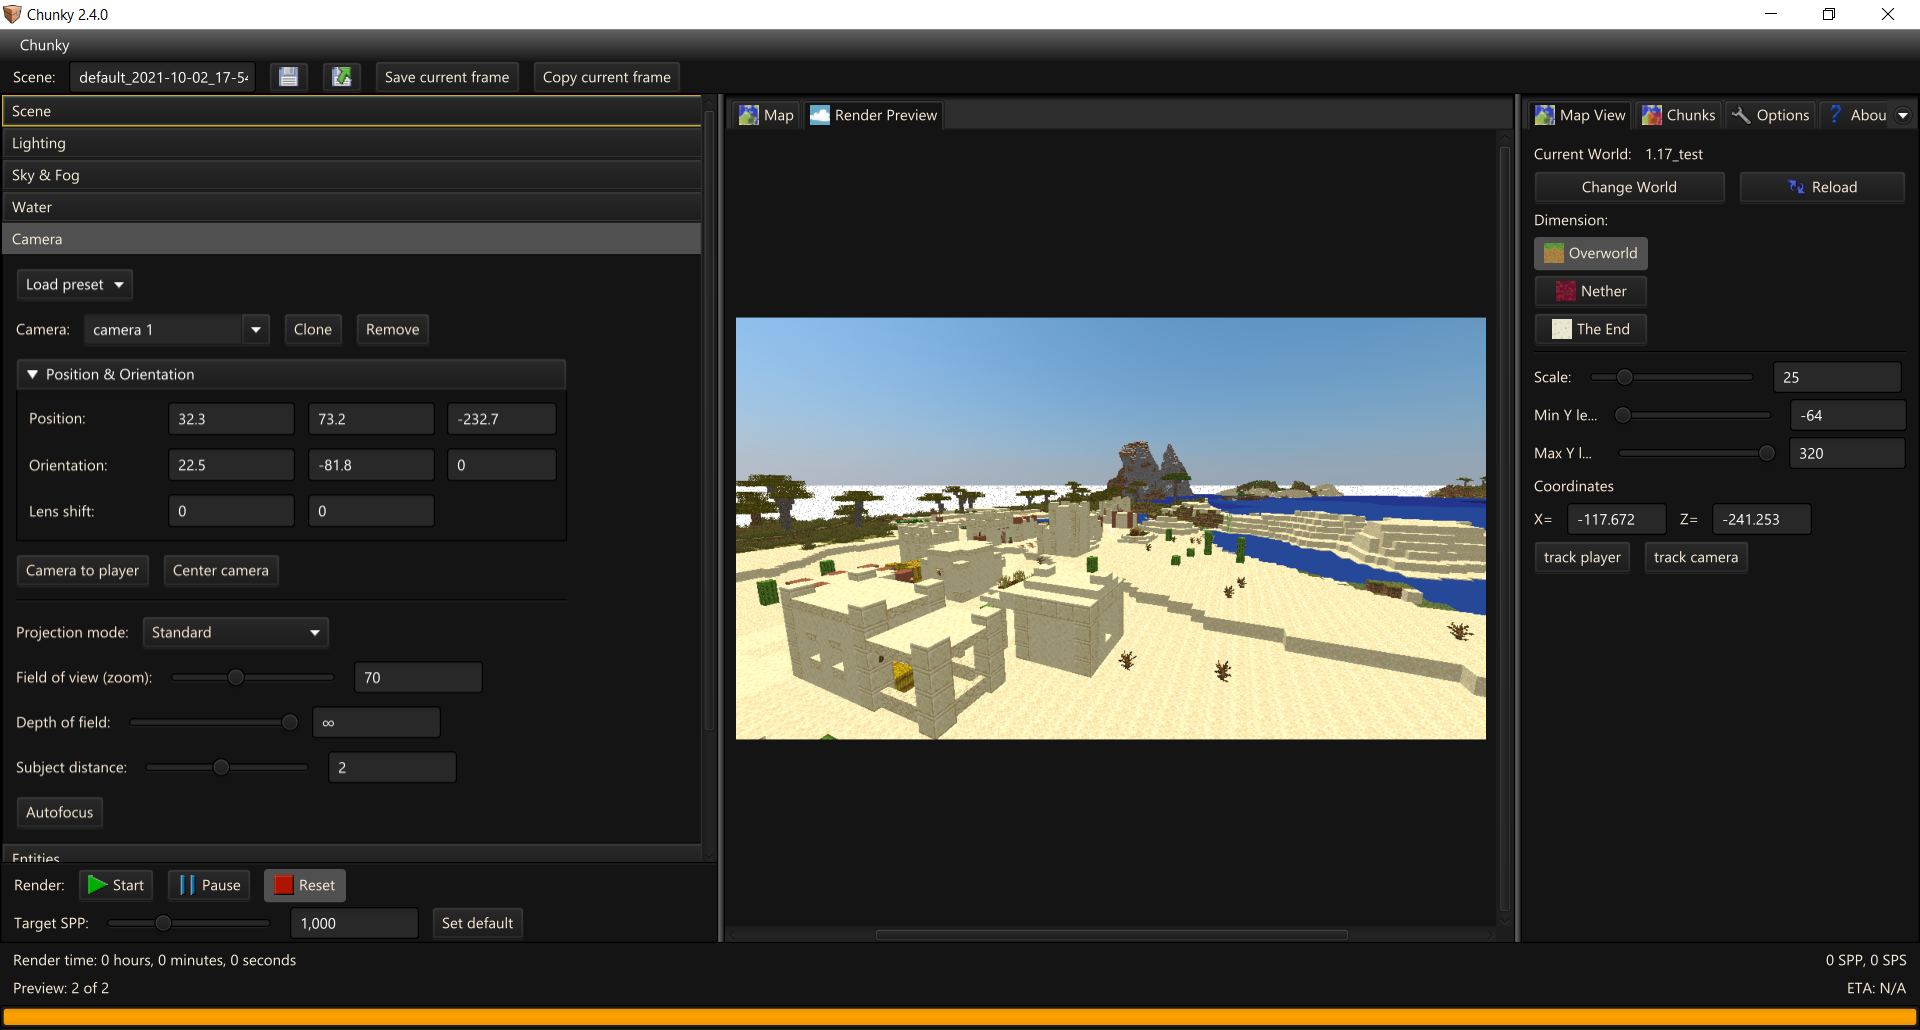
The default Field of View (FoV) for Minecraft is 70 degrees vertical. Assuming a 16:9 aspect ratio for both Minecraft and the Chunky render canvas resolution, the camera view with the default Chunky FoV of 70 degrees and the Standard projection mode should match the view in Mincraft.
Dynamic FoV
If dynamic FoV is enabled in Minecraft, flying in Minecraft will increase the FoV. Disable dynamic FoV in Minecraft by setting FOV Effects in Video Settings to 0% to get the same FoV as in Chunky, assuming both FoV settings match.
Lighting
Open the Lighting tab.
Figure 9: The Lighting tab
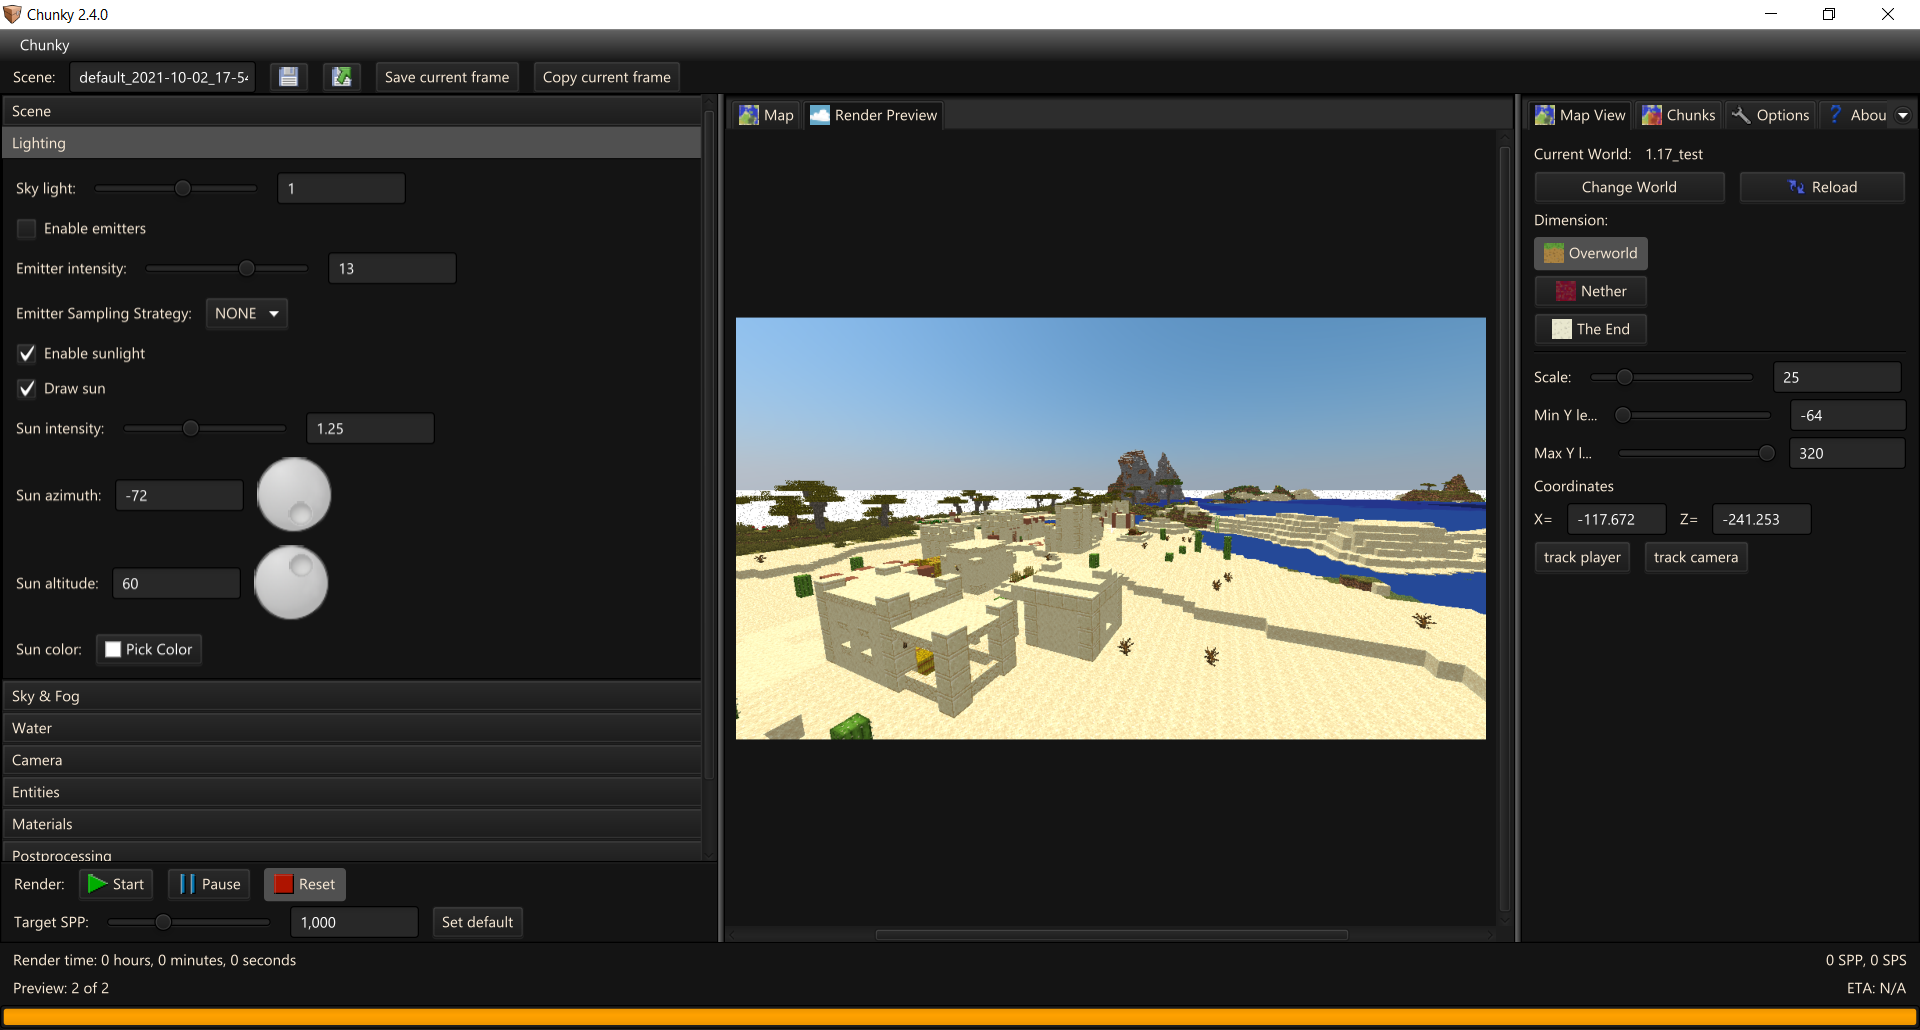
Here you can adjust the amount of light the Sky, Emitters (torches, glowstone, etc.), and Sun produce. The default values should be perfect for daytime renders. Adjusting the Sun azimuth (yaw / rotation) and altitude (height) can change the lighting of the scene dramatically.
For this example, I will simply set the Sun altitude to 25.
Emitters can significantly increase render times, and often require a much higher SPP to look smooth! Not rendering long enough will leave much noise, or "fireflies".
Sky and Fog
Open the Sky & Fog tab.
Figure 10: The Sky & Fog tab

There is not too much to explain here. The Sky mode setting lets you chose between a simulated sky, solid color, color gradient, and skymaps / skycubes. Cloud X, Cloud Y, and Cloud Z control the location of the clouds, and Cloud size controls the size of the clouds, if they are enabled using Enable clouds. Fog density controls the thickness of the fog; set it to 0 to disable it. There is an example fog density listed as a guide. Fog produces much noise, so expect longer render times.
Water
Open the Water tab.
Figure 11: The Water tab

By default, the water will have a slight wave effect applied to it. You can disable it by enabling Still water. The Water visibility setting affects how far underwater you can see. The Water opacity setting controls how transparent the surface of the water is. Setting it to 0 makes the water clear, and setting it to 1 makes the water a solid color. By default, water color is biome-tinted, but you can override this by enabling Use custom water color.
Entities
Open the Entities tab.
Adjust whatever you want in the entity tab to your liking. Press - to remove the selected entity from the render, and press + to add new entities.
Entities usually have a minimal effect on render times.
Materials & Postprocessing tabs
These tabs shall not be covered in this guide. Explore and experiment on your own. Read the articles for the Materials tab and for the Postprocessing tab for more information.
Advanced
Open the Advanced tab.
Figure 12: The Advanced tab
Adjust the CPU utilization and Render threads as you see fit. Chunky renders solely using the CPU, though a GPU rendering plugin is in development.
If you plan to use your PC while it is rendering or have a weaker computer, then reduce the CPU utilization or the Render threads as you see fit. Typically, reducing the number of threads that Chunky uses provides much more control over actual system usage. Be aware that reduced CPU load and fewer threads can significantly increase render times!
Set Ray Depth to whatever you want. A value anywhere from 3 to 8 is usually good enough for most scenes. Increasing ray depth increases render times but improves accuracy and render quality; a balance is required.
Enable Shutdown computer when render completes if you want your computer to shut down after the target SPP has been reached.
If you are using Linux, then this option will have no effect unless you allow the
shutdowncommand to run without needingsudo, since theshutdowncommand requires sudo permissions by default. For obvious reasons, Chunky won't store your sudo password for when it's time to execute the command. You can find a guide for allowing the shutdown command to run withoutsudoon the internet fairly easily.
You may wish to change the image Output mode here too.
Just before we render
Set the Target SPP to whatever you want.
SPP stands for Samples Per Pixel. Lower target SPP values will be reached sooner, but images rendered to lower SPP values may have more noise / grain / fireflies. A higher target SPP value will take longer to render to, but the image will be less noisy.
Typically, 32-1024 SPP is good for daylight renders without emitters (torches, lava, glowstone, etc.) enabled. For daylight renders with emitters, 4096-16384 SPP is better. For night-time renders or indoor renders with emitters, 16384 SPP or more is required to yield a sufficiently noise-free image.
Save the scene
Figure 13: Scene name, save, and load controls
In the top left of the Chunky window, enter a more reasonable scene name in the Scene input field. Then click the Save button, which is marked with a blue disk icon. To load a scene, click on the Load scene button, which is marked with a blue disk icon with a green arrow.
Render
When you are ready, click Start, and wait for your beautiful image to be produced.
This could take anywhere between two minutes and two years. Sit tight!
Should you need to stop at any point, click Pause, wait for CPU usage to dip down to idle, and then click the Save button. Wait for Chunky to finish saving the scene. Then it is safe to close Chunky. Failure to do so can lead to loss of render progress if not saving dumps frequently.
Profit!
You can use either Save current frame or Copy current frame at any point during the render progress to get your render. If the target SPP has been reached, then you can find the finished render in (assuming default locations):
-
Windows: "C:\Users\<username>\.chunky\scenes\<scene_name>\snapshots"
-
Linux: "/home/<username>/.chunky/scenes/<scene_name>/snapshots"
Alternatively, on the left control panel, inside the Scene tab, click Open Scene Directory.
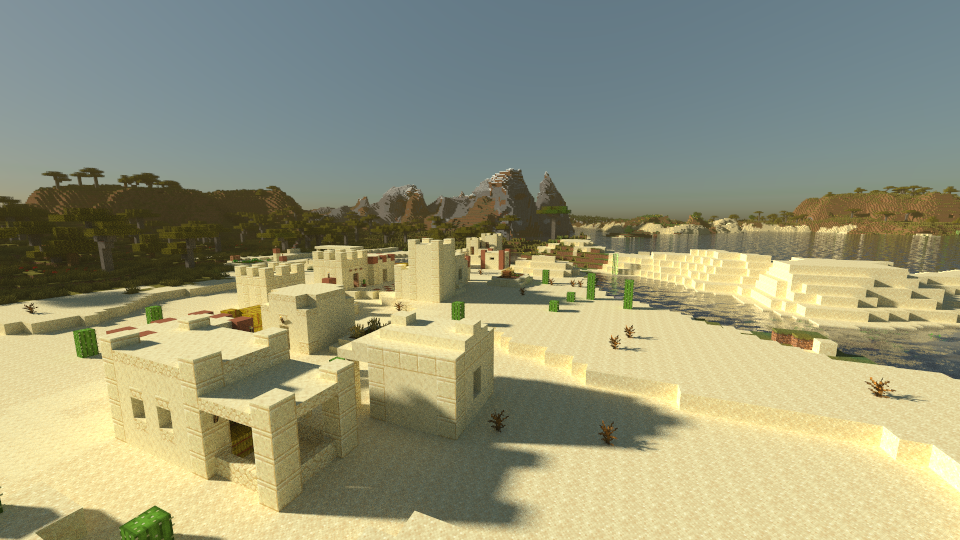
Figure 14 shows the finished product of this guide with a few minor tweaks to the sky simulation, the addition of fog, changes to the lighting intensities and color, and changes to the water.
Figure 14: The finished render
This guide was adapted and updated from a guide by EmeraldSnorlax.