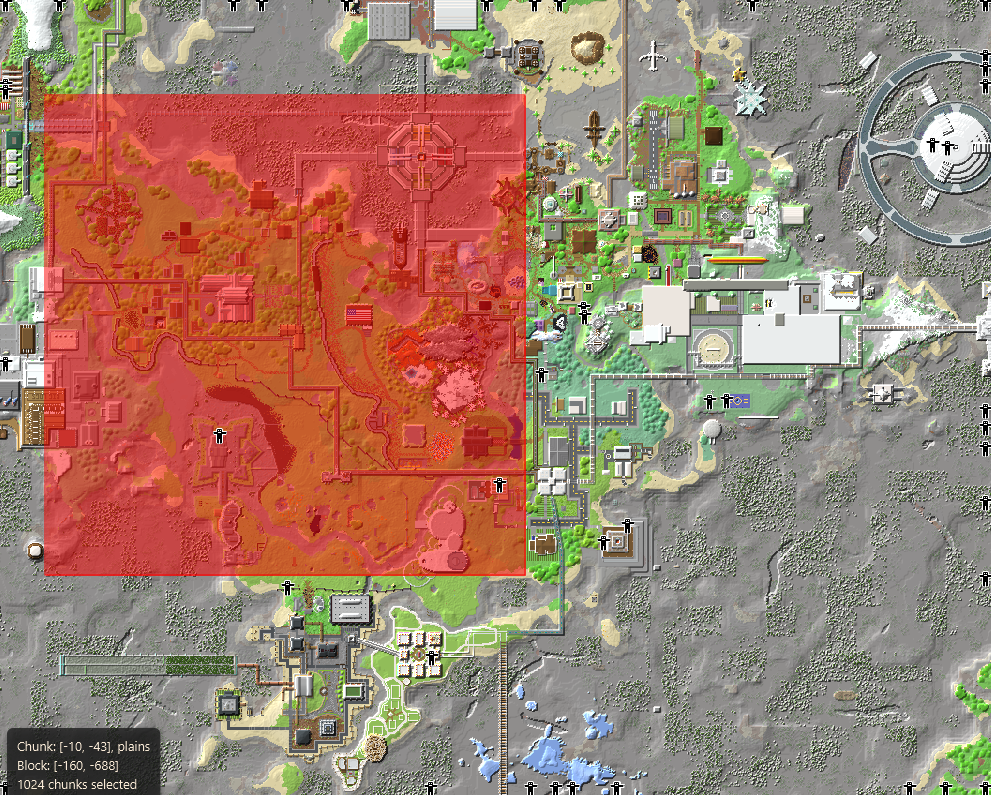
Map
The Map tab is the default view when Chunky is launched. It displays a 2D overhead view of the currently-loaded world. From this tab, chunk selections are made before being loaded.
Figure 1: The Map view
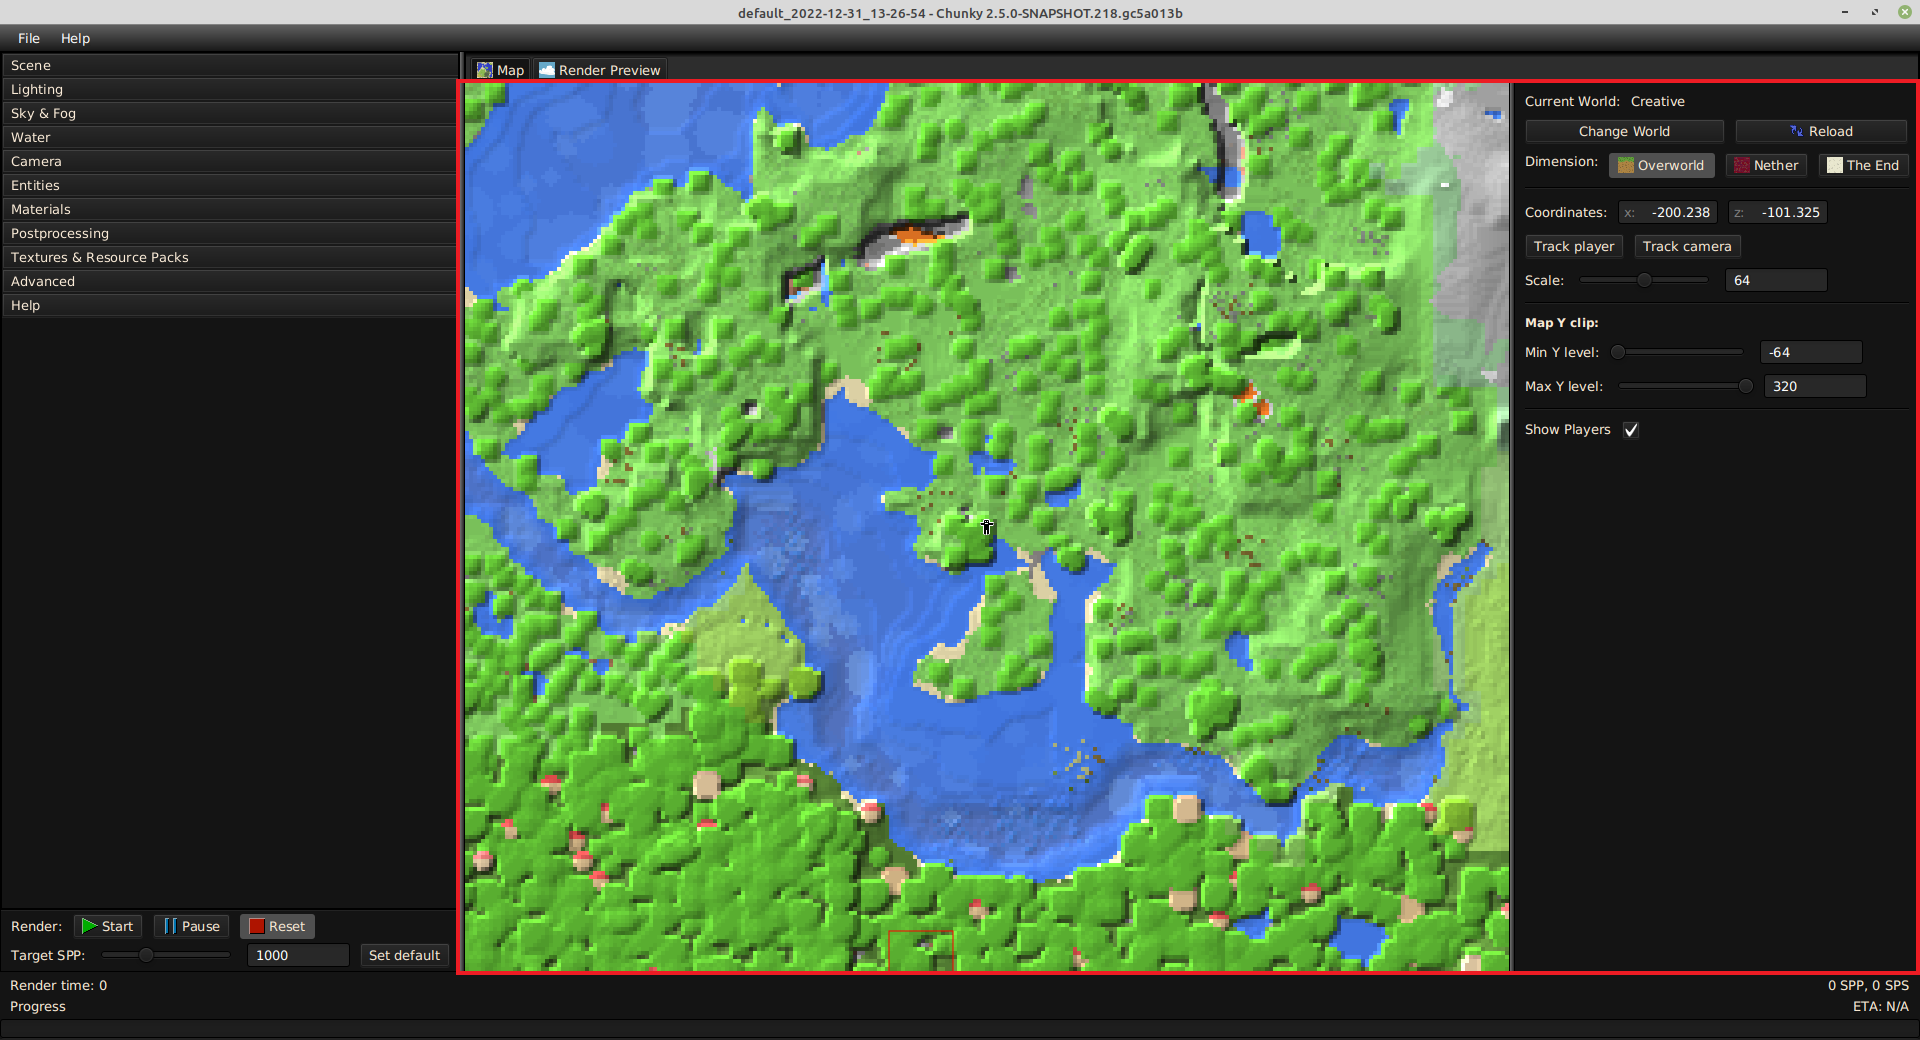
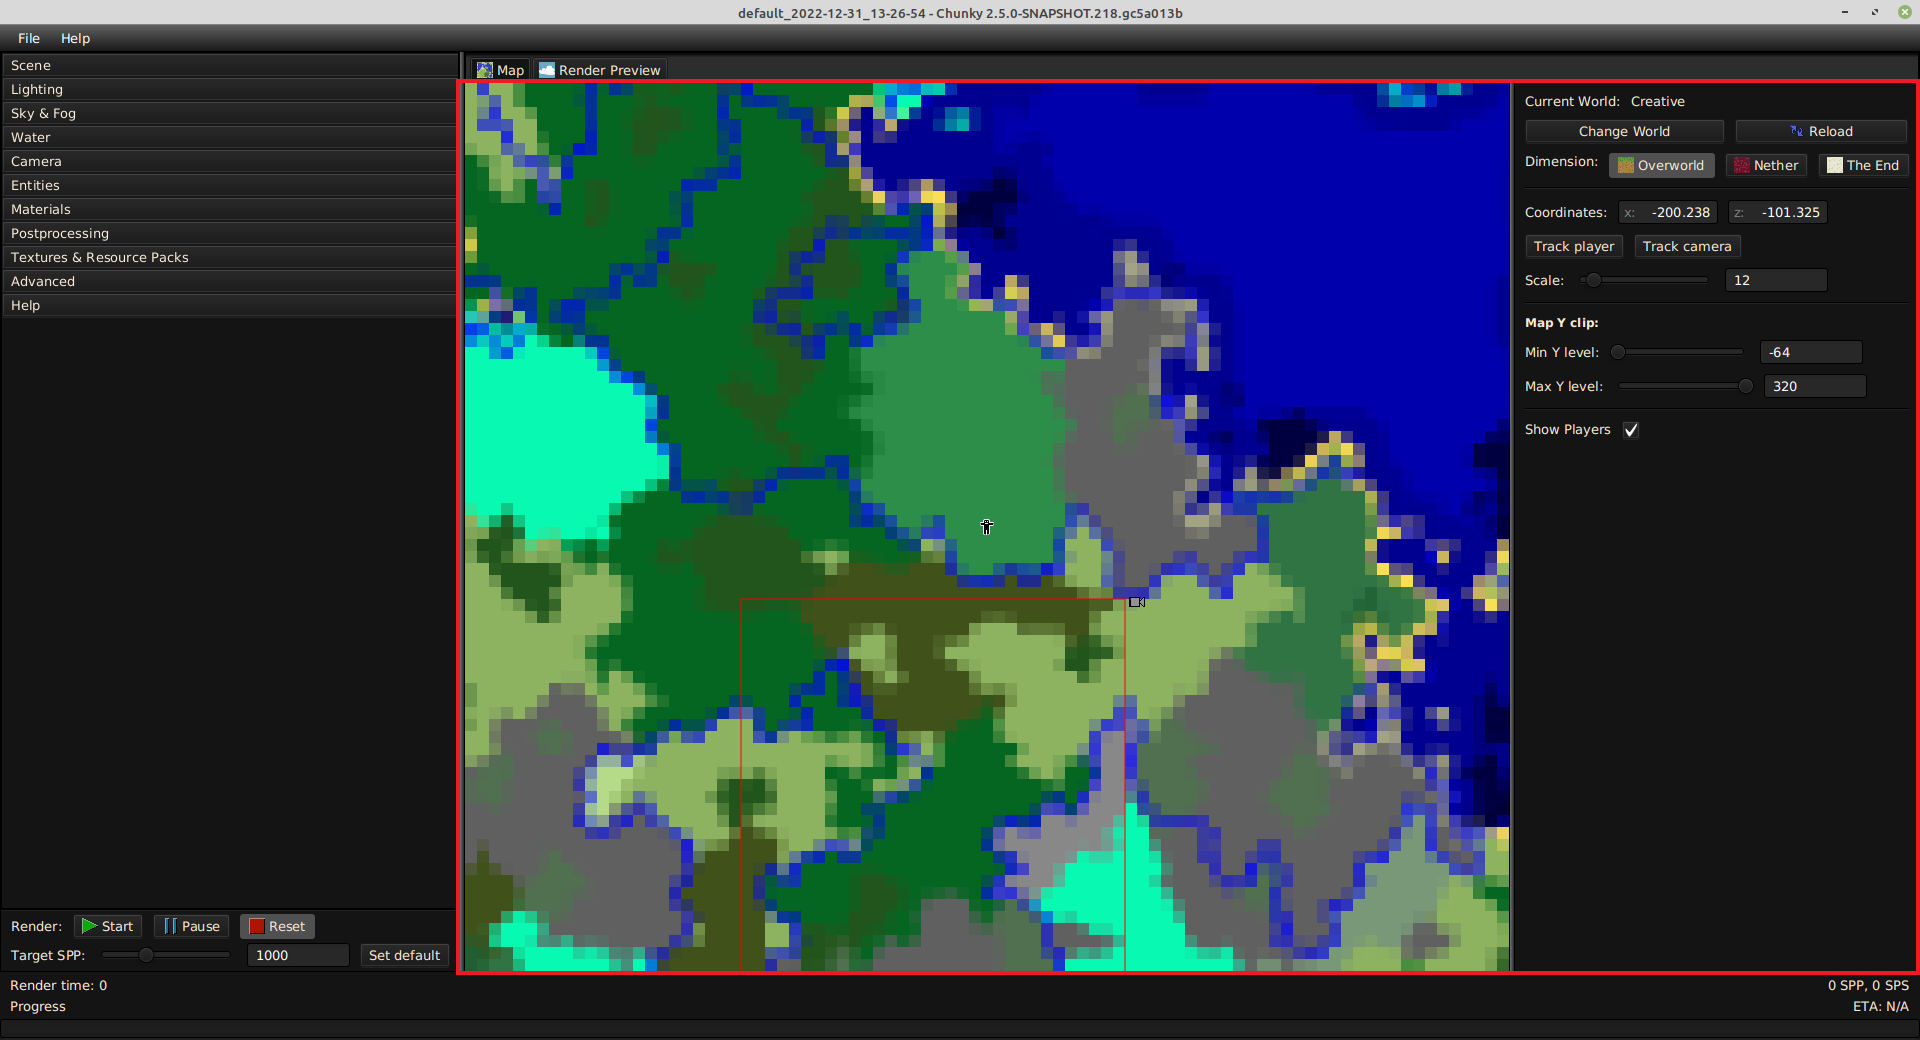
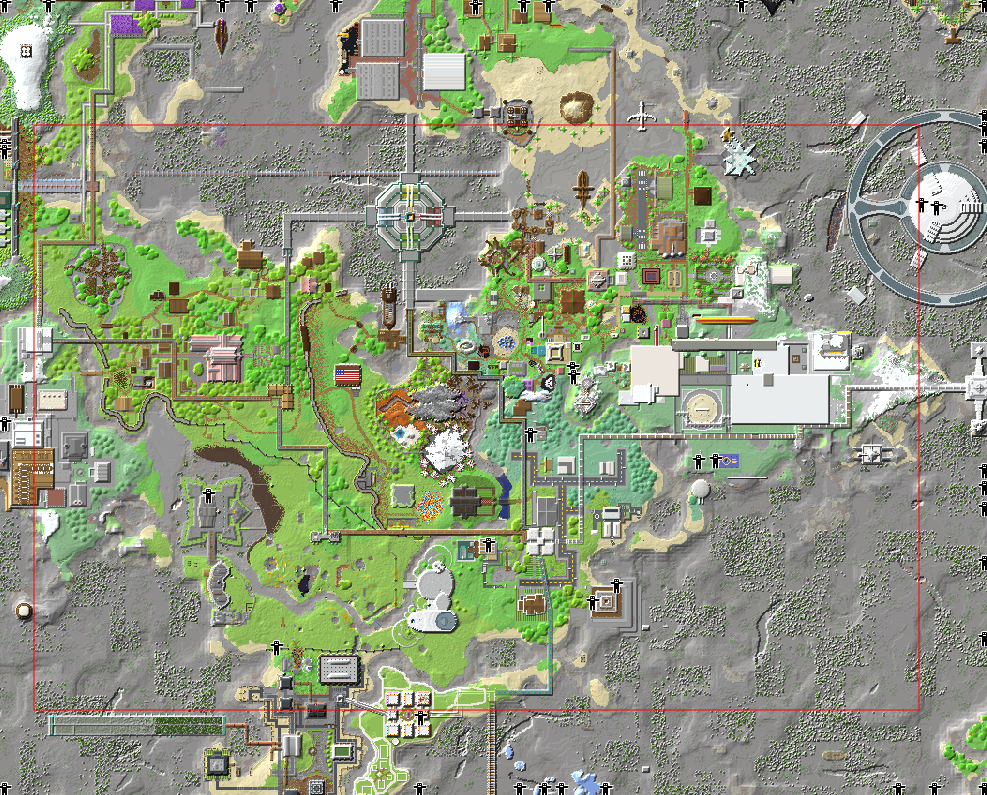
The map will display one of two display modes, depending on the map Scale. At a map scale of 13 or greater, Chunky will display individual blocks of the world (albeit in a simplified manner), and at a map scale of 12 or less, Chunky will display the biome map of the world, like the one in Figure 2.
Figure 2: The biome map
-
Left-click and drag: Move the map view.
-
Left-click: Select or deselect a chunk, if the map scale is 16 or greater; or region, if the map scale is 15 or less.
-
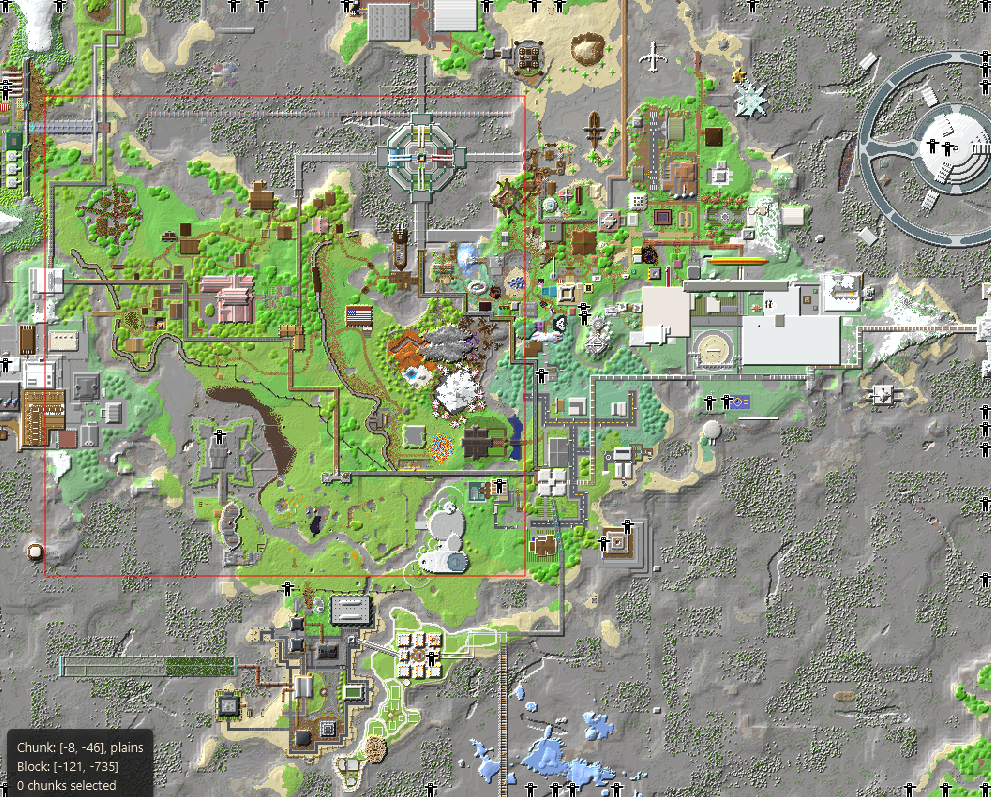
Shift + Left-click and drag: Create a resizable rectangular chunk selection. Shift does not need to be held down continuously after the resizable rectangle appears. Upon release of left-click, a selection of chunks is made.
-
Ctrl + Shift + Left-click and drag: Create a resizeable rectangular "de-selection". Upon release of left-click, the chunks within the rectangular de-selection will be removed from the selection.
-
Mouse wheel: Changes the map scale (zoom). Alternatively, the Scale control can be used.
-
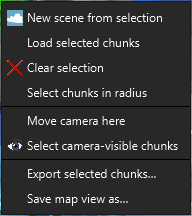
Right-click: Opens a context menu with some selection- and scene-related options.
Figure 3: Map view controls

Prior to left-clicking, an outline of the highlighted chunk will be shown. |
After left-clicking, the outline will be filled in and selected. |
Prior to left-clicking, an outline of the highlighted region will be shown. |
After left-clicking, the region outline will be filled in and selected. |
Resizable selection |
-
Change World: Opens the 'Select World' dialog box.
-
Reload: Reloads the currently-loaded world.
-
Dimension: Switches the map view to display one of the vanilla Minecraft dimensions.
-
Overworld: Switches the map view to display the Overworld dimension of the currently-loaded world.
-
Nether: Switches the map view to display the Nether dimension of the currently-loaded world. If the Nether for the world has not been generated, then the map view will display emptiness.
-
The End: Switches the map view to display the End dimension of the currently-loaded world. If the End for the world has not been generated, then the map view will display emptiness.
-
-
Coordinates: The map view is always centered on the X- and Z-coordinates displayed.
-
X=: Input field for the X-coordinate to center the map view over.
-
Z=: Input field for the Z-coordinate to center the map view over.
-
-
Track player: Centers the map view on the coordinates of the player.
-
Track camera: Centers the map view on the coordinates of the camera.
-
Scale: Changes the scale of the map, which is measured in pixels per chunk. This results in the field of view (zoom) of the map view changing. (Alternatively, the scroll wheel can be used to change map scale.)
-
Map Y clip: The map view displays the range of blocks specified by the Min Y level and Max Y level controls.
-
Min Y Level: Changes the minimum Y level of blocks to be displayed in the map view. Values beyond the range of the slider can be entered into the associated input field.
-
Max Y Level: Changes the maximum Y level of blocks to be displayed in the map view. Values beyond the range of the slider can be entered into the associated input field.
-
-
Show players: Changes whether the icons that indicate the locations of players in the world are visible.
Right-click Menu
Right-clicking in the map opens a context menu containing some selection- and scene-related options.
Figure 4: Map tab right-click menu
-
New scene from selection: Creates a new scene from the selected chunks.
-
Load selected chunks: Loads the selected chunks.
-
Clear selection: Clears the chunk selection.
-
Select chunks in radius: Opens the 'Select chunks in radius' dialog box.
-
Move camera here: Moves the scene camera selected in the Camera tab to the coordinates of the right-click.
-
Select camera-visible chunks: Selects the chunks visible to the scene camera and currently visible in the map view.
-
Export selected chunks...: Opens a 'Save As' dialog box to export the selected chunks as region files containing the chunks to a ZIP archive.
-
Save map view as...: Opens a 'Save As' dialog box to export the current map view as a PNG file.
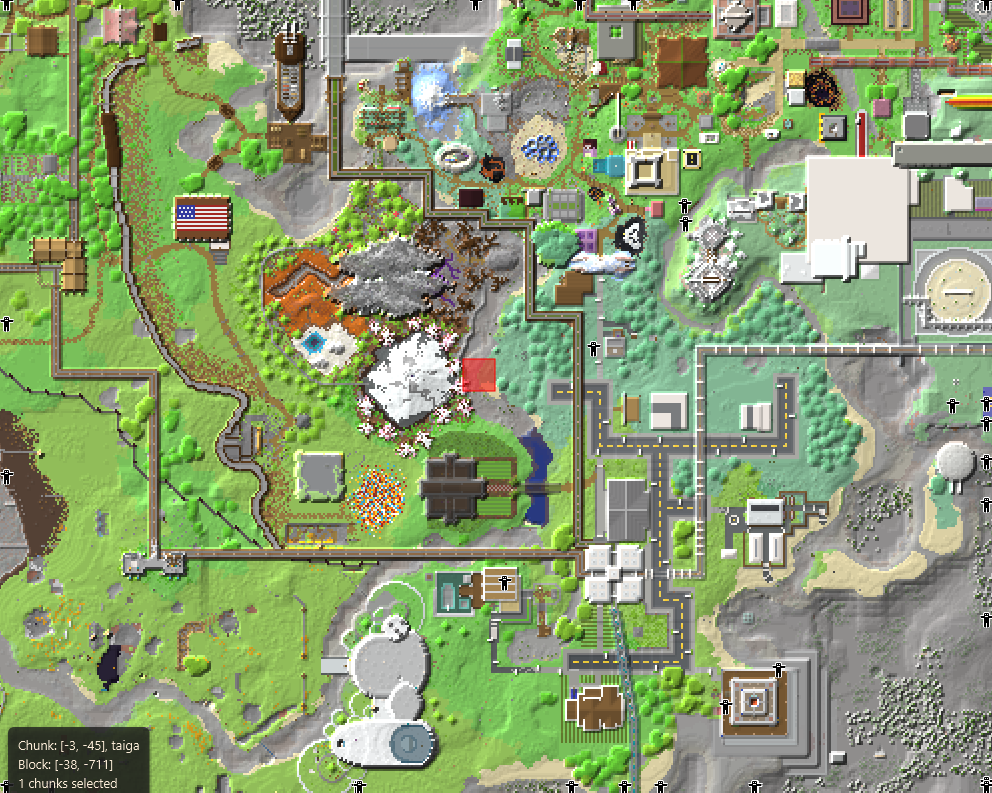
Details
The map view displays a box containing information about the chunk, if any, and the block, if any, that the cursor is hovering over, and the size of the current chunk selection.
Figure 5: The map view details box
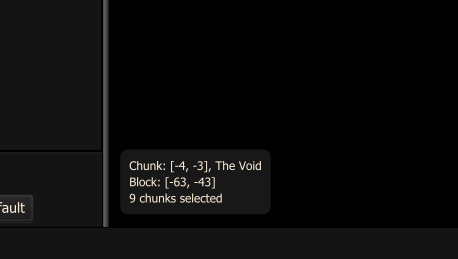
The three lines in the box provide the following information:
-
The coordinates of the chunk that the cursor is hovering over; and the biome that is at the location of the block that is at Y = 0 and the X- and Z-coordinates of the block over which the cursor is hovering.
-
The X- and Z-coordinates of the block over which the cursor is hovering.
-
The number of chunks that are currently selected.
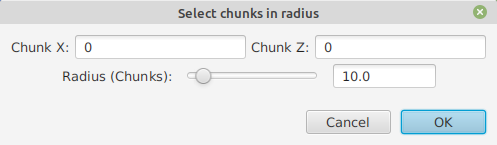
Select Chunks in Radius
The 'Select chunks in radius' dialog box, shown in Figure 6, allows a set of chunks within a specified distance from a specified location to be selected.
Figure 6: 'Select chunks in radius' dialog box
-
Chunk X: Input field for the chunk X-coordinate of the location around which all chunks within a specified distance will be selected.
-
Chunk Z: Input field for the chunk Z-coordinate of the location around which all chunks within a specified distance will be selected.
-
Radius (Chunks): Input field for the distance, measured in chunks, within which all chunks around the location specified by the Chunk X and Chunk Z controls will be selected.
-
Cancel: Closes the 'Select chunks in radius' without applying any selection changes.
-
OK: Selects the set of chunks defined by the Chunk X, Chunk Z, and Radius (Chunks) controls, and closes the 'Select chunks in radius' dialog box.
Select World
The 'Select World' dialog box, shown in Figure 7, displays a list of all detected worlds, along with some details about each world, and some world browsing controls at the bottom.
Figure 7: 'Select World' dialog box
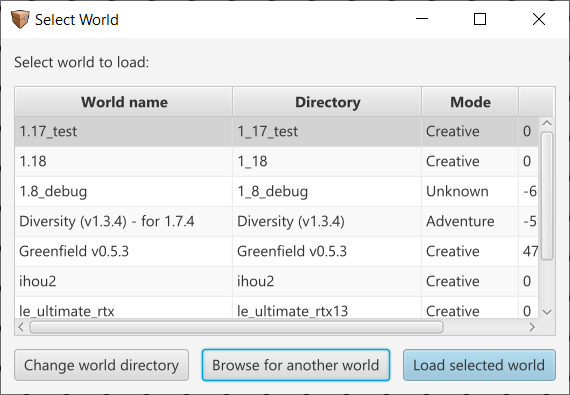
By default, Chunky will display worlds from the "saves" folder of the Minecraft directory specified in the Chunky Launcher.
The column headers can be clicked to reorder the worlds by any listed detail. A world in the list can be clicked to select it.
-
Change world directory: Opens a file explorer dialog box to select a folder from which Chunky should display worlds in the list.
-
Browse for another world: Opens a file explorer dialog box to select a world for Chunky to load. The parent folder of the world that is selected becomes the folder from which Chunky displays worlds in the list.
-
Load selected world: Loads the currently-selected world. Alternatively, the world can be loaded by double-clicking its list entry.